group members: Thom, Nate, Firm + Kate
here is a video :
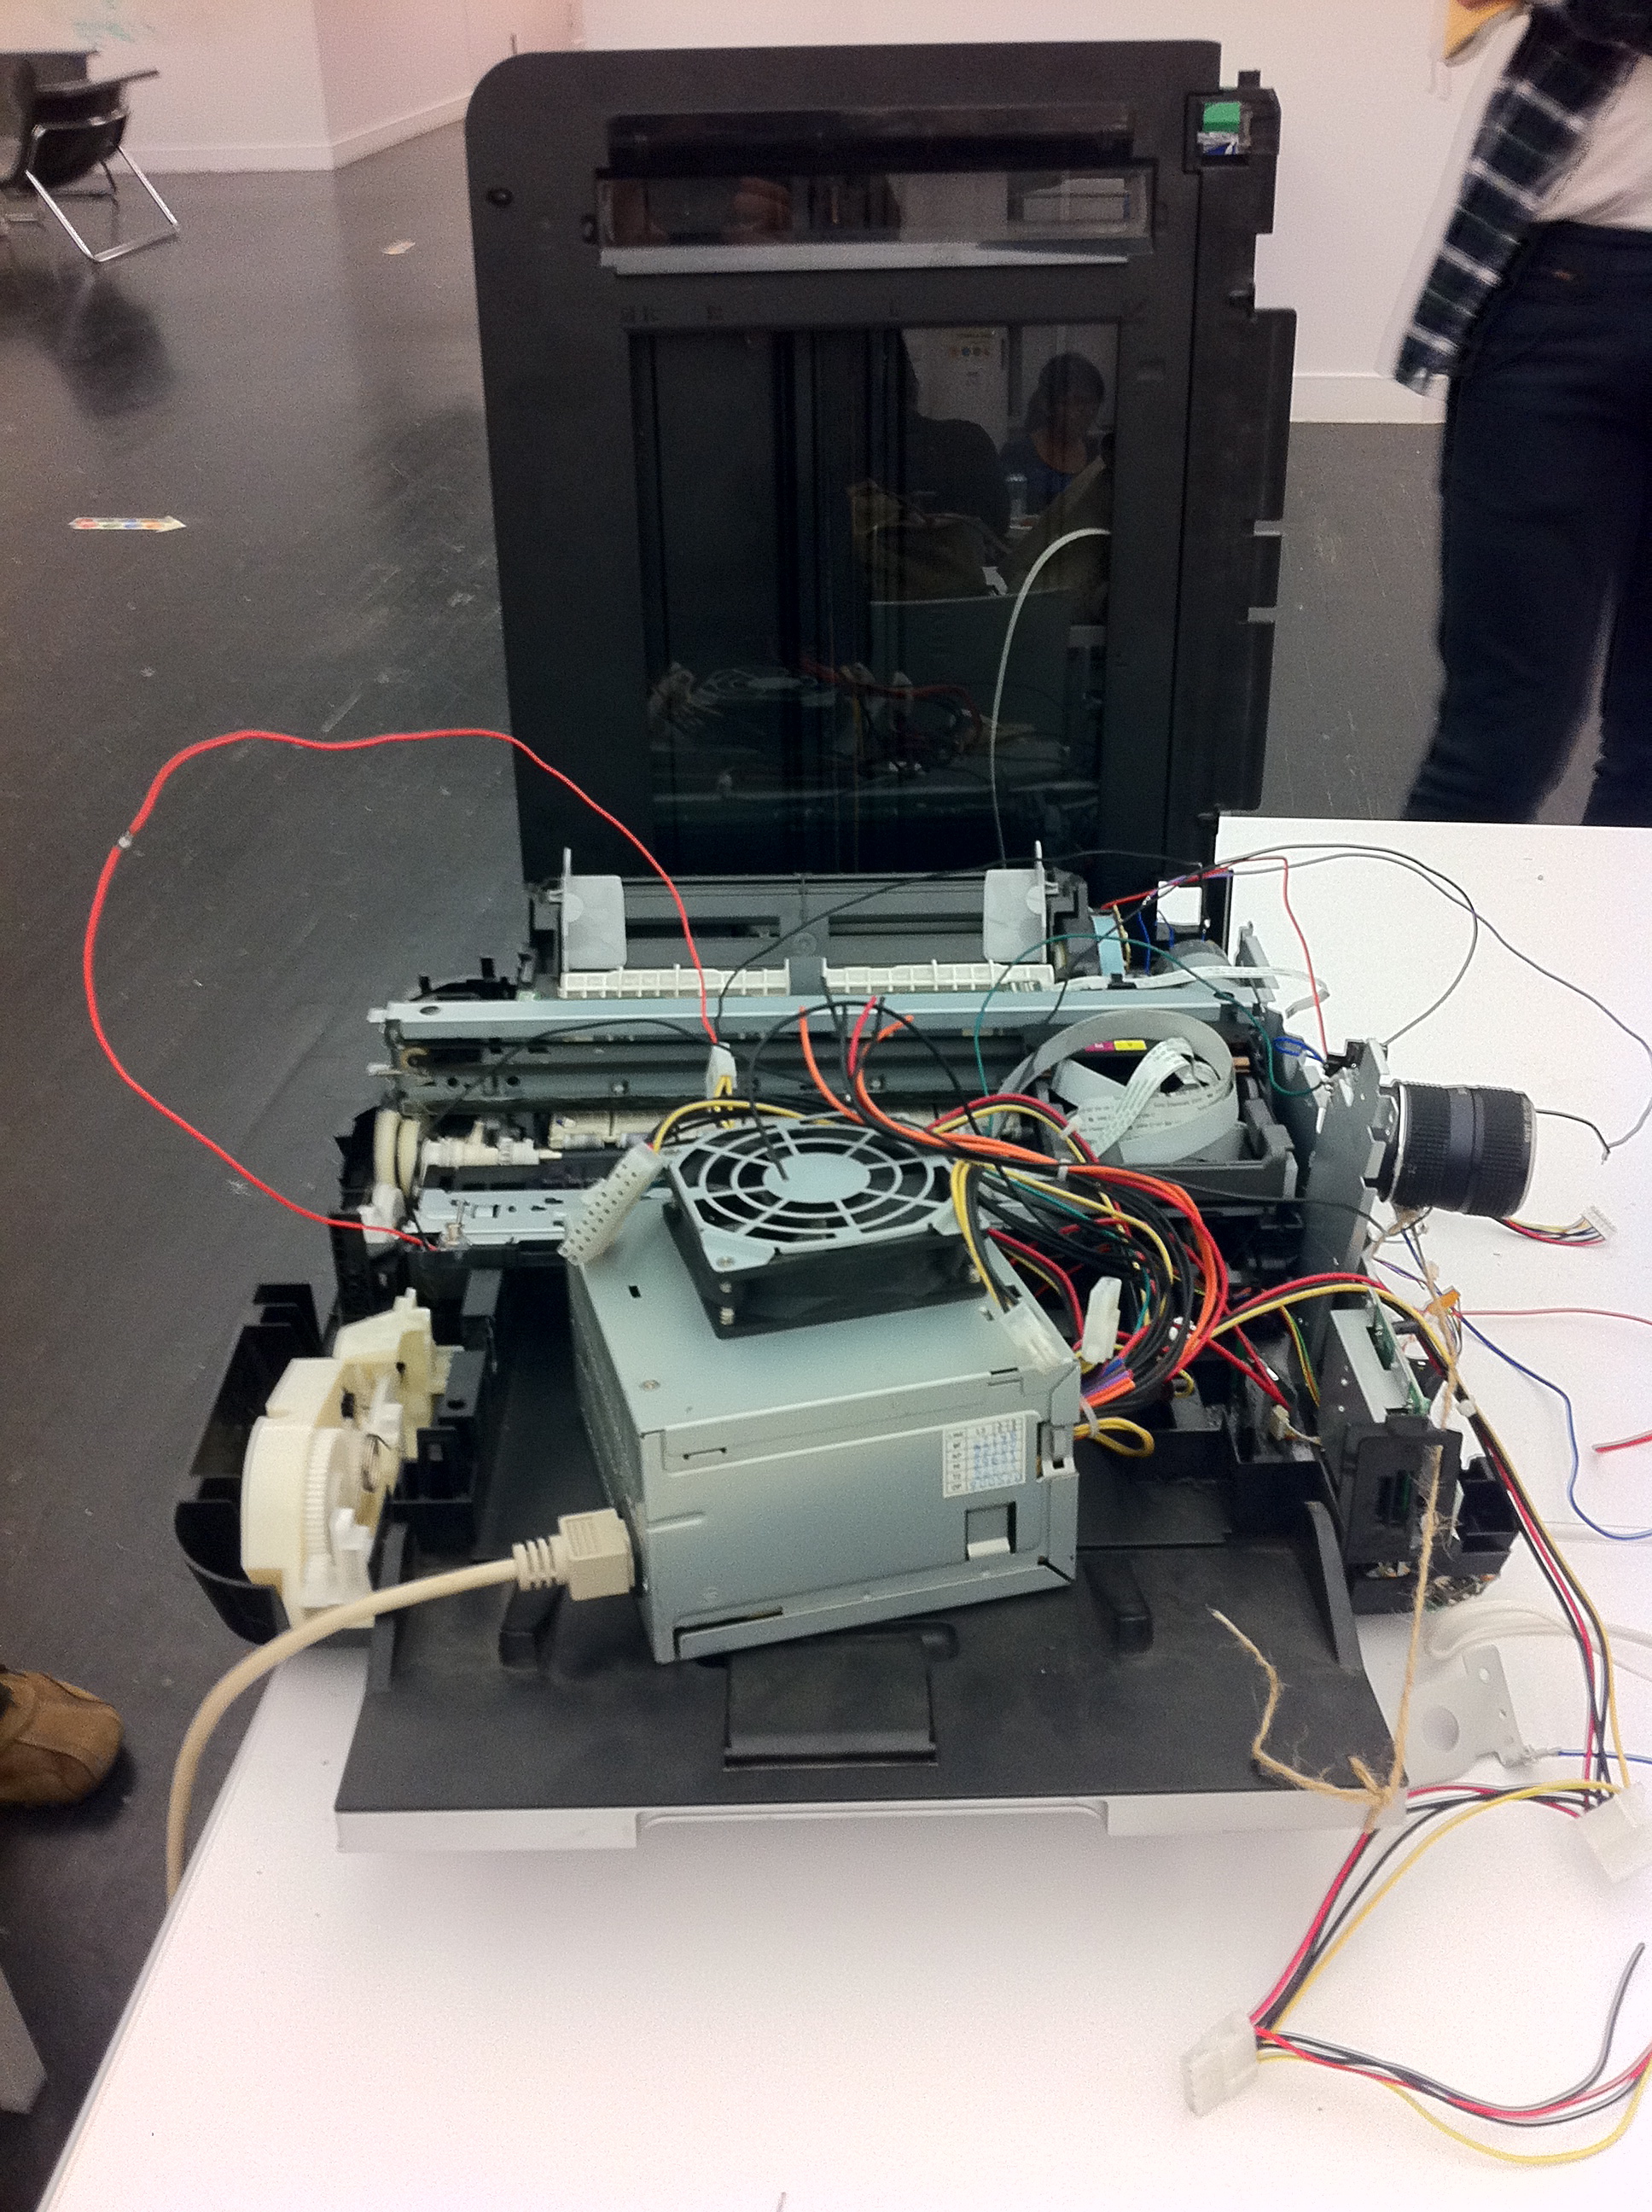
Project description : Inputs + Outputs :
Everything goes by super fast in the video, but to break things down here’s the flow:
1) The power gets activated. (Shown by pushing the ‘test’ button on the power supply)
2) Power activates the motor which sends the ink tray across the printer. Since the motor would normally keep trying to push the ink tray one direction, causing a nasty clicking sound, we installed a kill switch that the tray flicks as it passes which turns off the motor.
3) The ink tray knocks over part of the old printer’s power supply casing which is tied to a string, which is in turn tied to a lever. When the casing drops it pulls on the string with enough force to throw the lever.
4) The lever starts some gears in motion that drops the paper tray on the printer.
5) The paper tray is attached by a string which is tied to a camera lens. When the tray drops it pulls the lens’ zoom.
6) That lens has a small arm that extends and retracts when manipulated. We attached to wire leads to that arm, causing another circuit to be closed or opened depending on the lens’ state. When the string pulls the arm is retracted and the circuit closed, causing the scanner’s light bar to start moving.