[DeadTech] Hey, Respect old Keyboard’s Privacy!

On this project, I attempted to hack this musical keyboard toy. But I had a hard time to figure out the way to hack keys of this toy. Because of the circuit is very low quality that buttons are impossible to hack. So instead of recreate all the circuit inside just to make it works like it was, I decided to focus on the interaction and the story of the keyboard.

Utilizing proximity ultrasonic sensor installed on the side of the keys, I was able to recreate the experience of interaction with the keyboard that user can move their hand along the length of keys and create different musical notes. However, I decide to give the piece some twist. I inverted that experience. That because I inspired by the experience of cleaning it when I got it from trash pile around Brooklyn. This keyboard is extremely dusty that I have to buy a wet wipe to clean it right away before carrying it home. Which I think that this keyboard is so unloved and haven’t been play for such a long time. One reason is that it broke. And now I’ve give it back a chance to make noise again. Maybe it will started to hate human and sings just for itself. So when human trying to touch it, it will scream to stop them from touching. But if human stay at certain distance it’ll sing by itself, out of its own enthusiasm.


(Final) Twitter News Network


Materials:
Samsung TV 1983 Model No. CT-505LD Made in Korea
Polaroid TV/VGA Monitor
TV static video file downloaded from Medialink
Openframeworks V.007

This project was an opportunity to explore dead and lost technology. In this case, the term technology was applied to anything that was essential to our daily life. From handwriting and speech, to electronics.
Our goal was to identify an “old technology” that is being replaced by a “new technology.” In other words, a new way to do things.
I chose to revive a previous project called “First On Twitter.” On the past project I commented on the overuse of Twitter in television news. Applied to this dead and lost technology project, I chose to consider how Twitter in some sense is replacing television news.
In this case the dead technology was represented by the 1983 Samsung TV and the static video. With the death of analog TV transmissions static or snow will never be seen again.
(Read about white noise)
Interestingly enough another dead technology that emerged was the openframeworks code I had written a year ago. Due to the computer and library upgrades the code did not work. It is amazing how within a year technology can become completely obsolete. This project was an opportunity for me re-learn and re-write the code.
The technology being lost is represented by television news. In the past few years television news have a new competitor for breaking news: Twitter. The times where broadcast journalists competed with one another to have an exclusive or break a story is disappearing. News now break on Twitter and TV news networks are using Twitter as a complement to communicate the news.
With this in mind, using openframeworks I created a news channel called Twitter News Network which was displayed inside an old TV. All the tweets that have the word “breaking news” are parsed and displayed on the screen on top of the stative video as a television banner with the shape of a comic speech bubble to indicate that the device is generating the information. The text to speech openframeworks library reads the tweet out loud.
This is a representation of the death of analog television, an era without Twitter and the emergence on top of that old technology of a digital way of communication and information.

After showing this project contained in an old television set to former broadcast journalists they thought that the project definitely speaks to the current transformation of the TV news industry and it could easily be implemented as a mobile device app, as well as an installation at the museum dedicated to News in DC, the Newseum.

rube goldberg experiment : final documentation

group members: Thom, Nate, Firm + Kate

here is a video :

Project description : Inputs + Outputs :

Everything goes by super fast in the video, but to break things down here’s the flow:

1) The power gets activated. (Shown by pushing the ‘test’ button on the power supply)

2) Power activates the motor which sends the ink tray across the printer. Since the motor would normally keep trying to push the ink tray one direction, causing a nasty clicking sound, we installed a kill switch that the tray flicks as it passes which turns off the motor.

3) The ink tray knocks over part of the old printer’s power supply casing which is tied to a string, which is in turn tied to a lever. When the casing drops it pulls on the string with enough force to throw the lever.

4) The lever starts some gears in motion that drops the paper tray on the printer.

5) The paper tray is attached by a string which is tied to a camera lens. When the tray drops it pulls the lens’ zoom.

6) That lens has a small arm that extends and retracts when manipulated. We attached to wire leads to that arm, causing another circuit to be closed or opened depending on the lens’ state. When the string pulls the arm is retracted and the circuit closed, causing the scanner’s light bar to start moving.

(Final) Atari Blender


Materials:


Dead tech: Atari 2600
Paddle control (1972)


Osterizer Blender
8 speeds
Purchased on or about 2002


For this project we had to repurpose a dead tech. Our deadline changed and I decided to do a hack that I could tackle. I don’t have much of a background on electronics, other than building very simple circuits, so hacking these two devices was a new adventure.


First, I searched for dead tech at home. I found a Dell trackball mouse, and an old telephone. I kept searching for more and at my town’s E-waste dumpster I found a karaoke machine, but later we found out that it was full of mites. At the Scrapyard Challenge MIDI workshop a couple of Atari paddles were left over and I thought perhaps I could do something with it. One thing I was clear. I wanted to do something that was not game related. So, I thought: What could inform an Atari controller that is not a game?


Considering the main interactions on the control, a simple non-continous switch and a potentiometer, the closest interaction I could think of was to playing back a movie (play, pause, rewind, fast forward).
But, our deadline shrank to one week instead of two. So, I went back to some of the examples that Jonah and Katherine showed us in class for inspiration. One of them was game remote controls controlling home appliances including a blender. Given the time constraint, I move on to see if I could make the pictures I saw work in real life.
I have a blender I rarely use, so I decided to hook up my blender to the Atari paddle control. I have never done any of this before. I opened up my blender and saw all the components that make it work, and how the motor enclosure and casing are designed so they don’t get tangled and so the energy generated by the motor does not make the blender base move on the table while is being operated.
I also figured out how the circuit board works, how the motor and the different speeds are connected to the main switch board. I did a search online to find out the specs, but I was only able to find consumer specs.
I connected the power cord to the Atari switch to turn the blender on and off. Then I figured out the wire motor’s highest speed and I connected it to the potentiometer. I was able to control the motor speed using the Atari paddle momentarily until it burned. Katherine explained the use of relays to regulate the electricity flow from the 110V on the wall. We tried using a relay a friend gave me, but it turned out to be for house alarms. We then tried to use a triac and battery power but the current was probably not enough, and the blender did not work.
I went back to the initial wiring connecting the Atari to the blender and it worked again.

Scrapyard Challege Dead Tech

Final Project – The Grammoshield

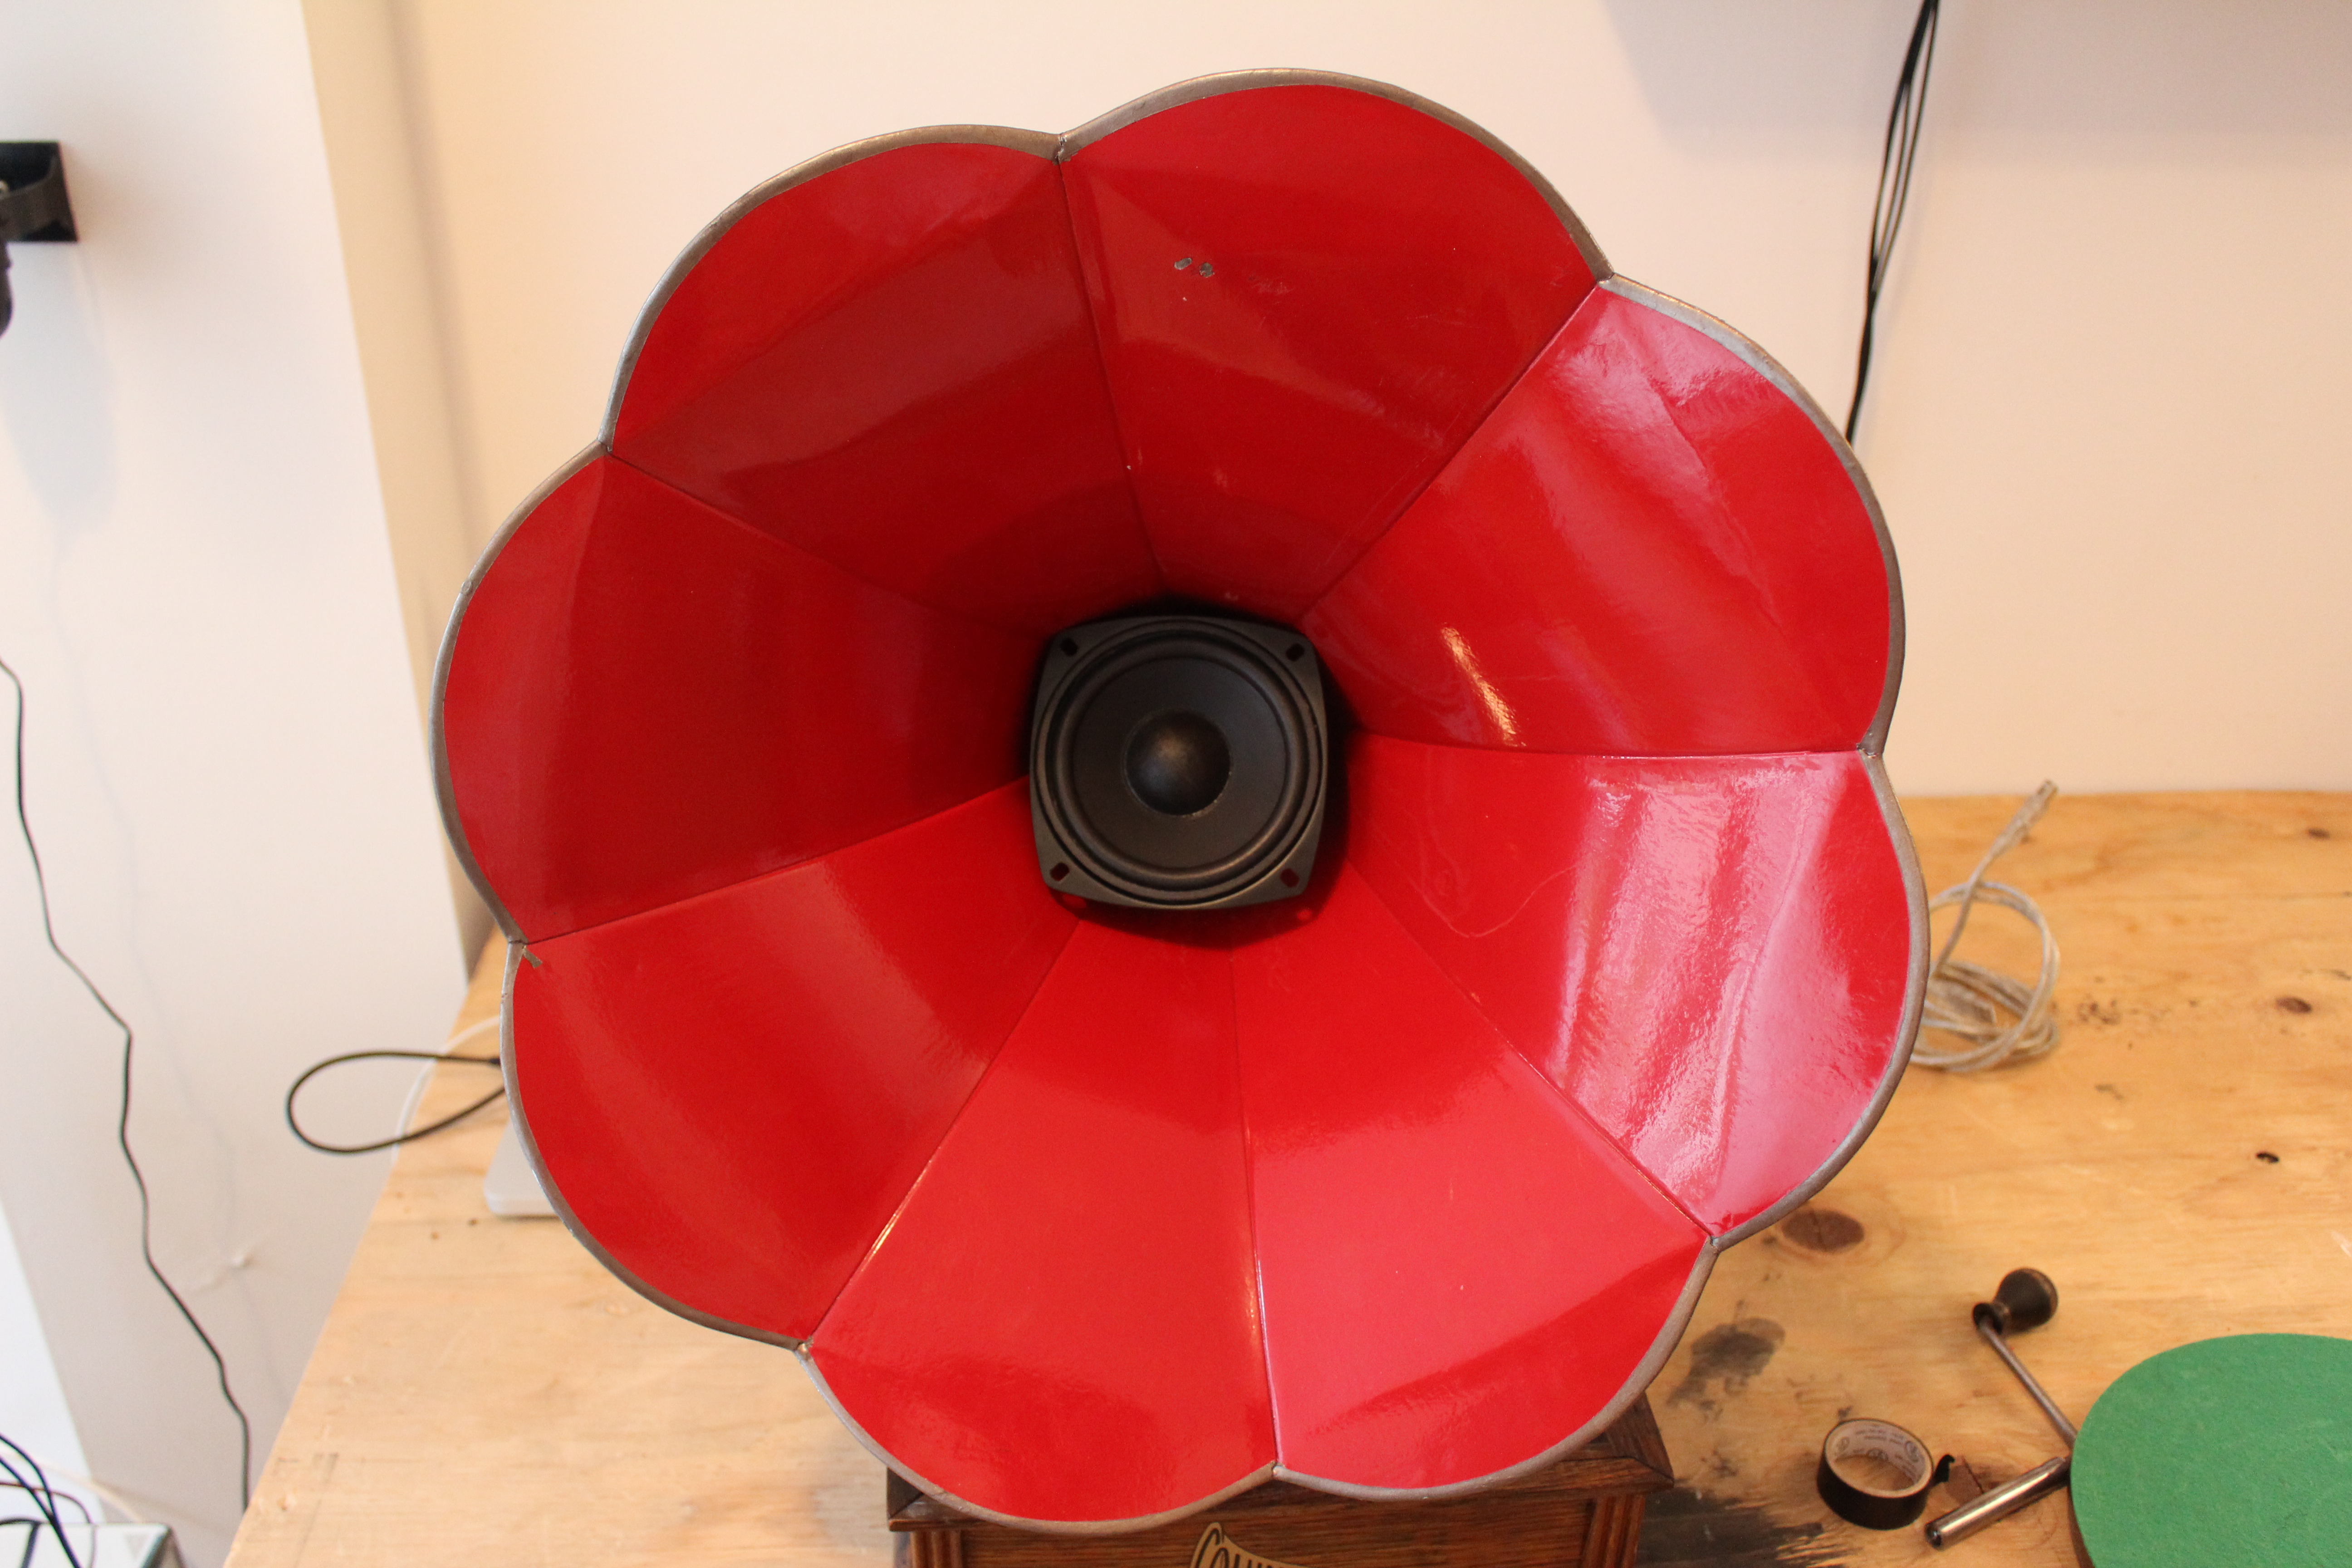
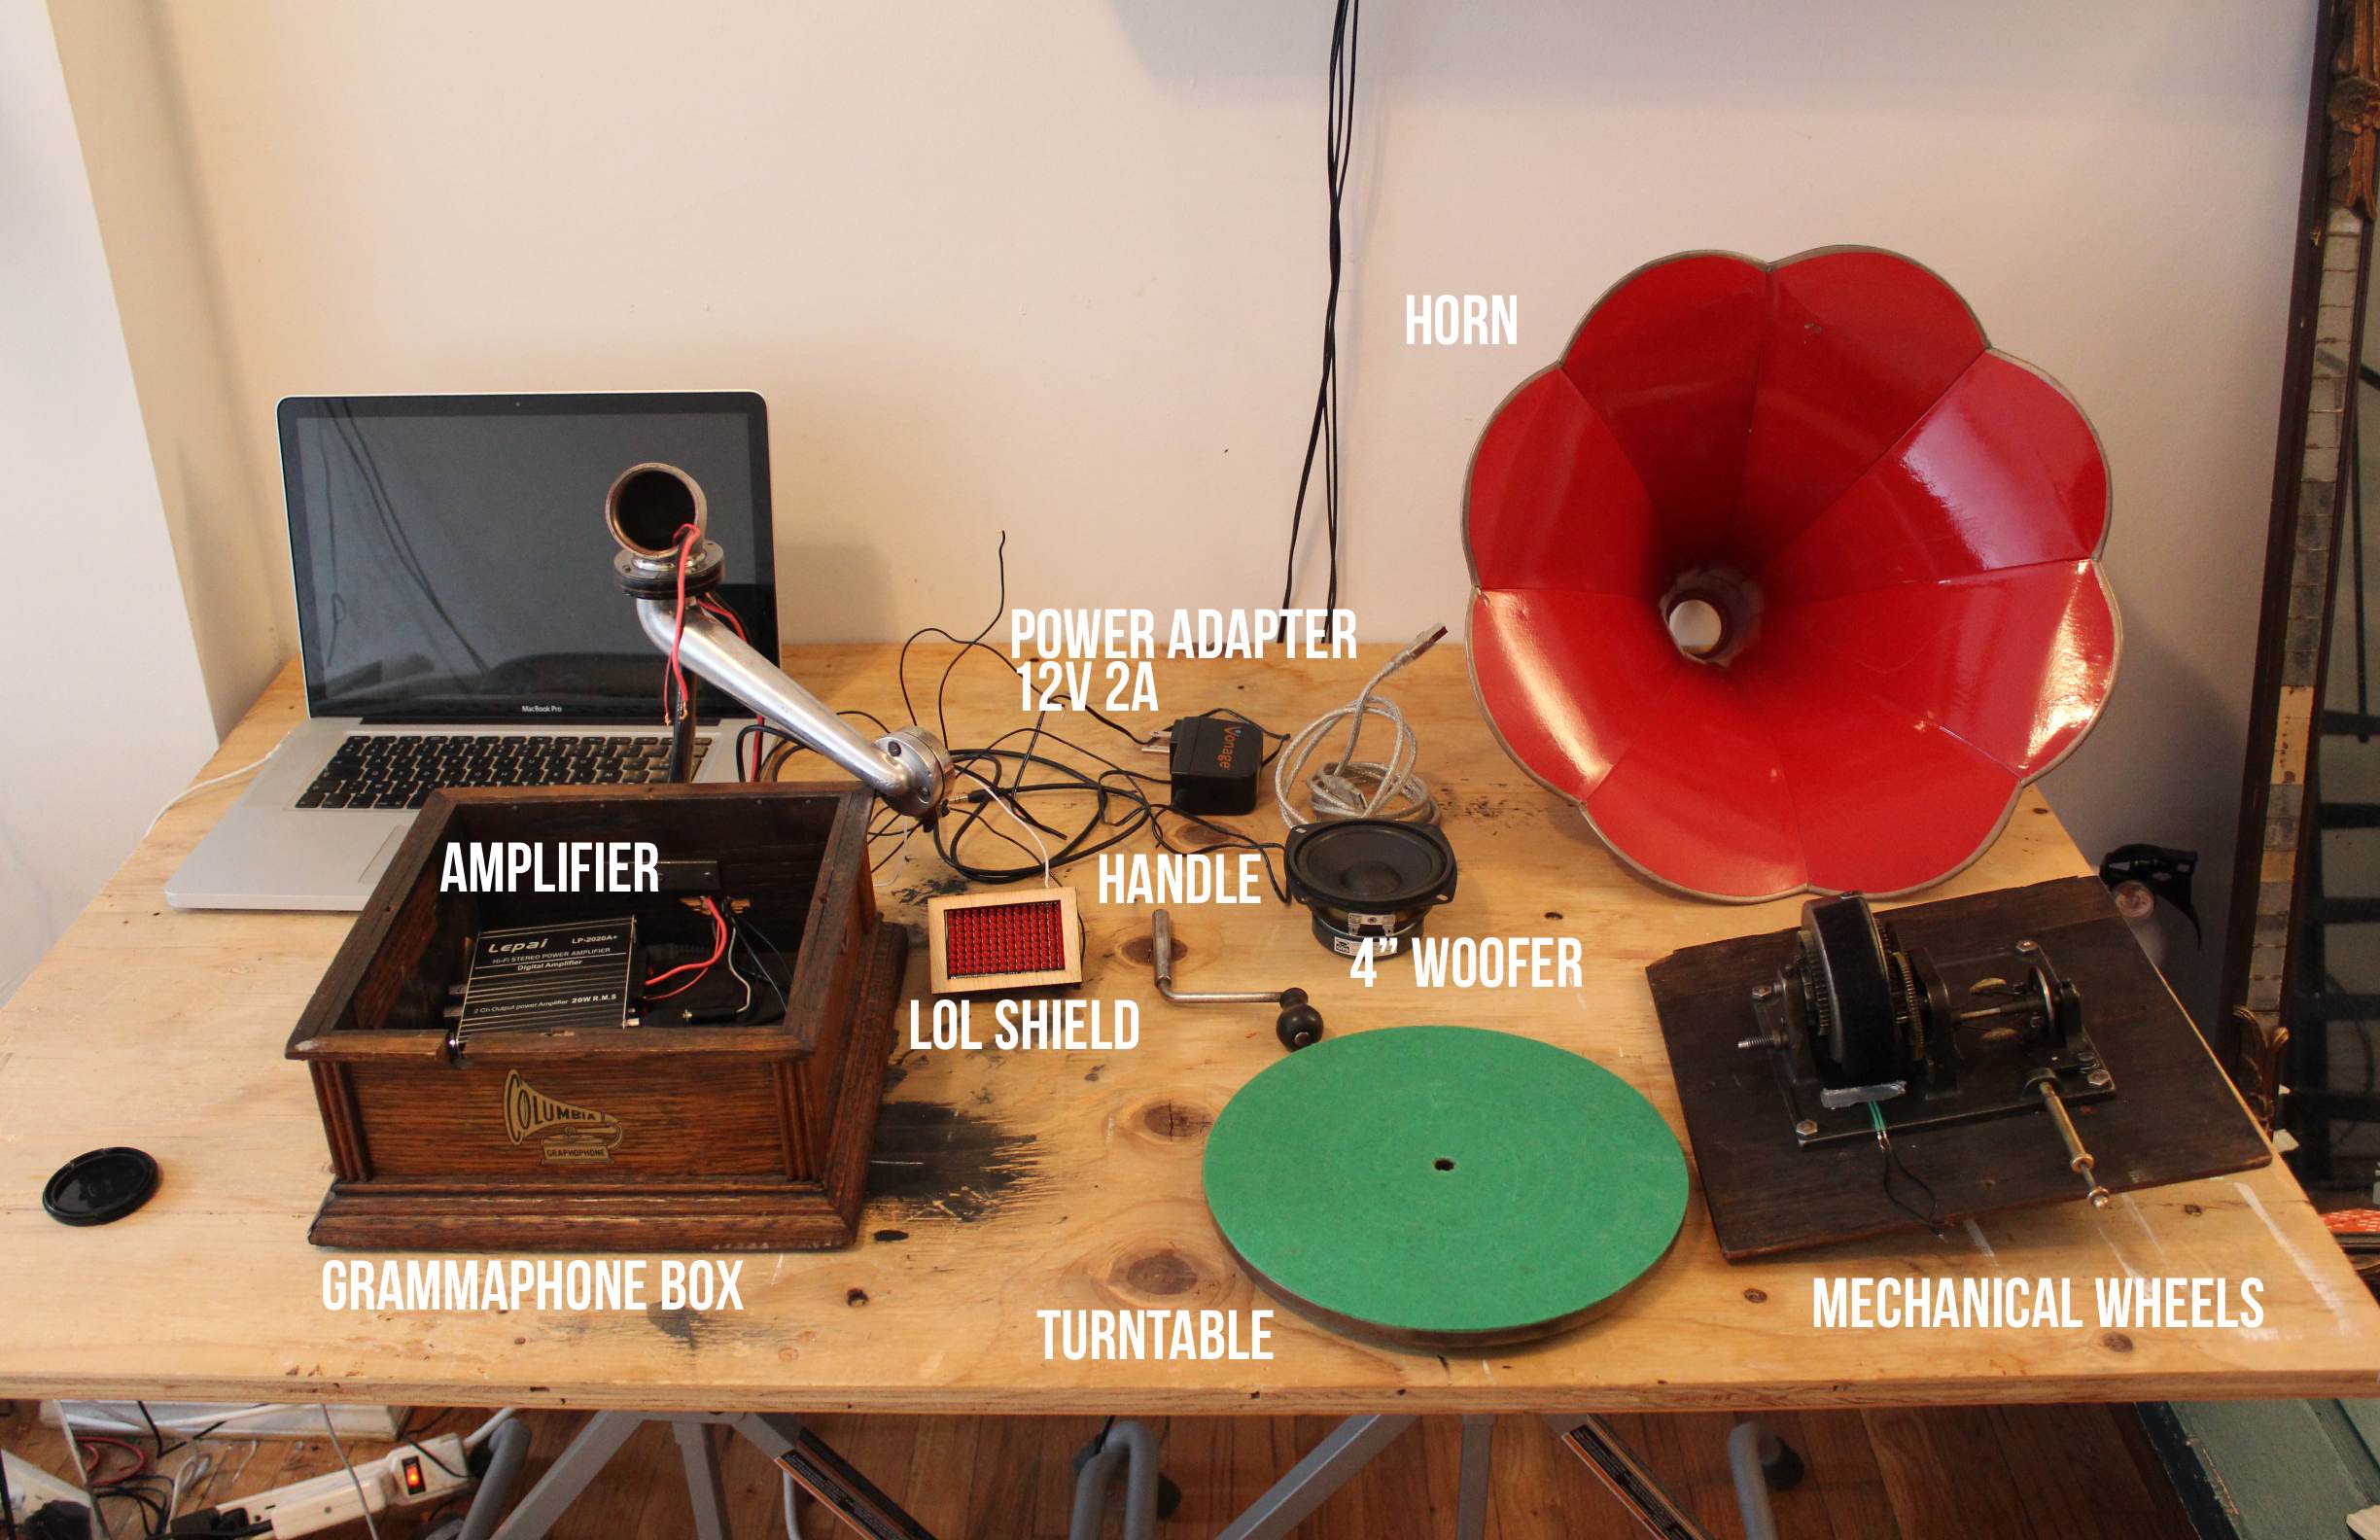
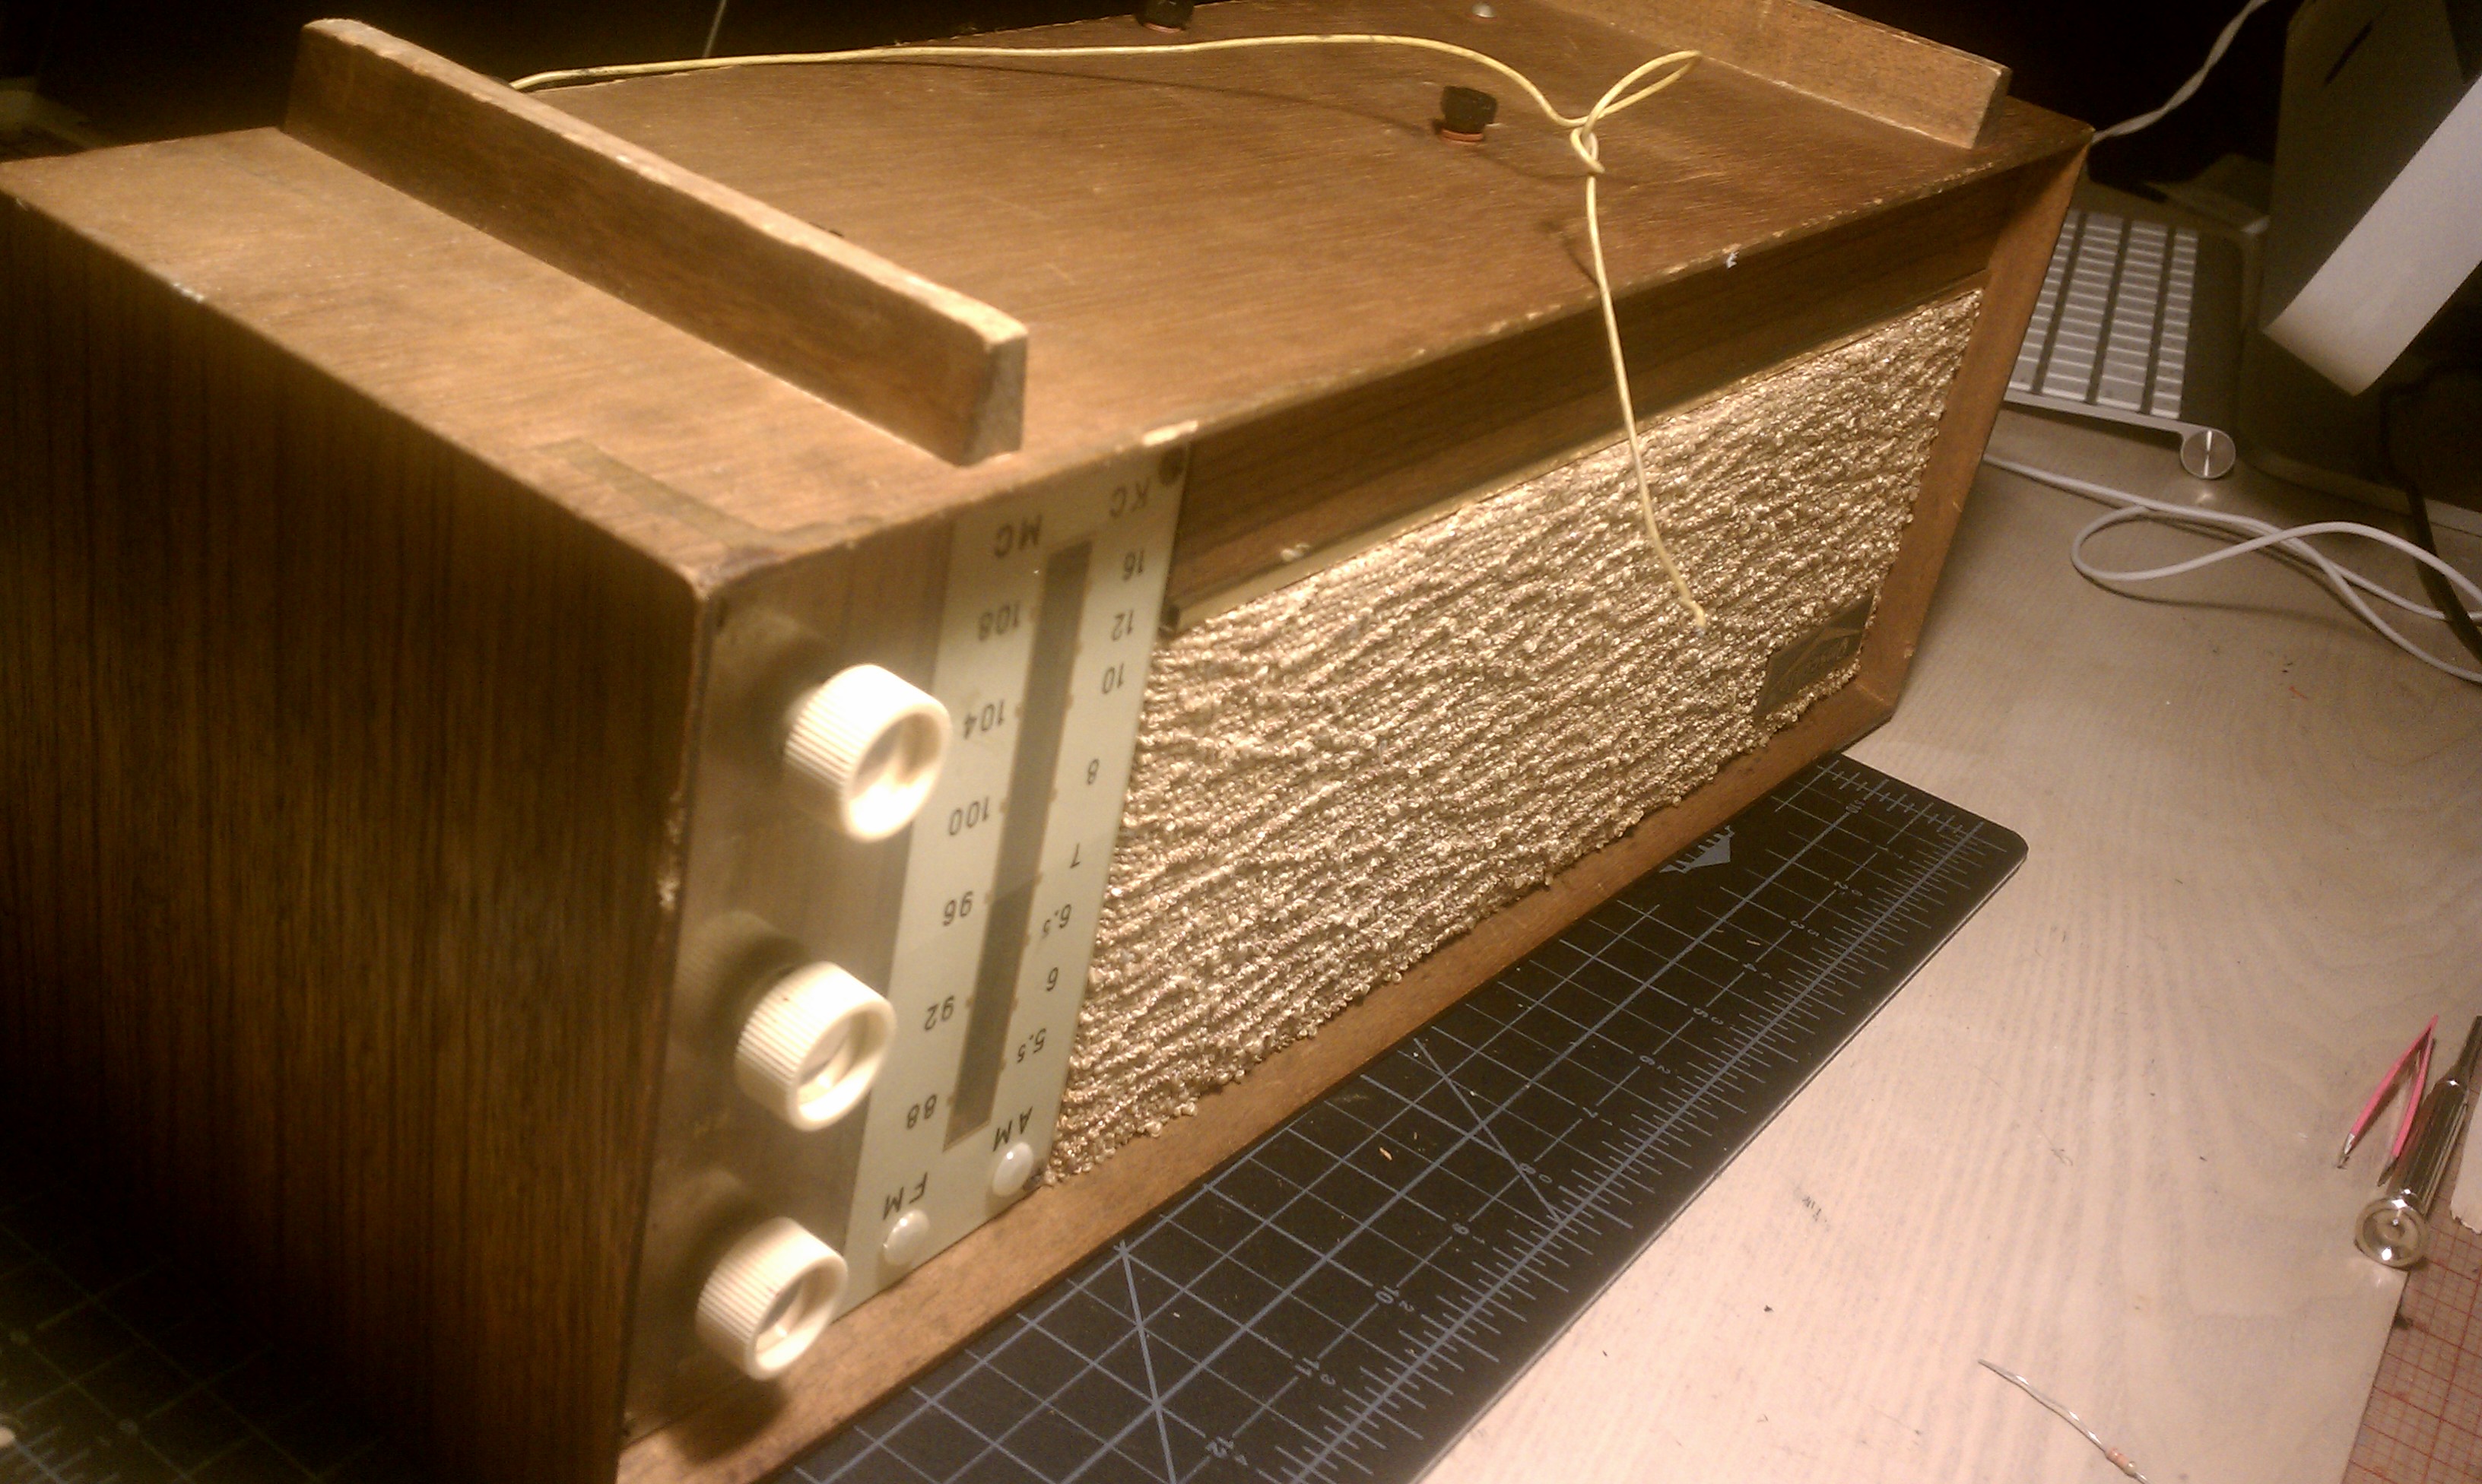
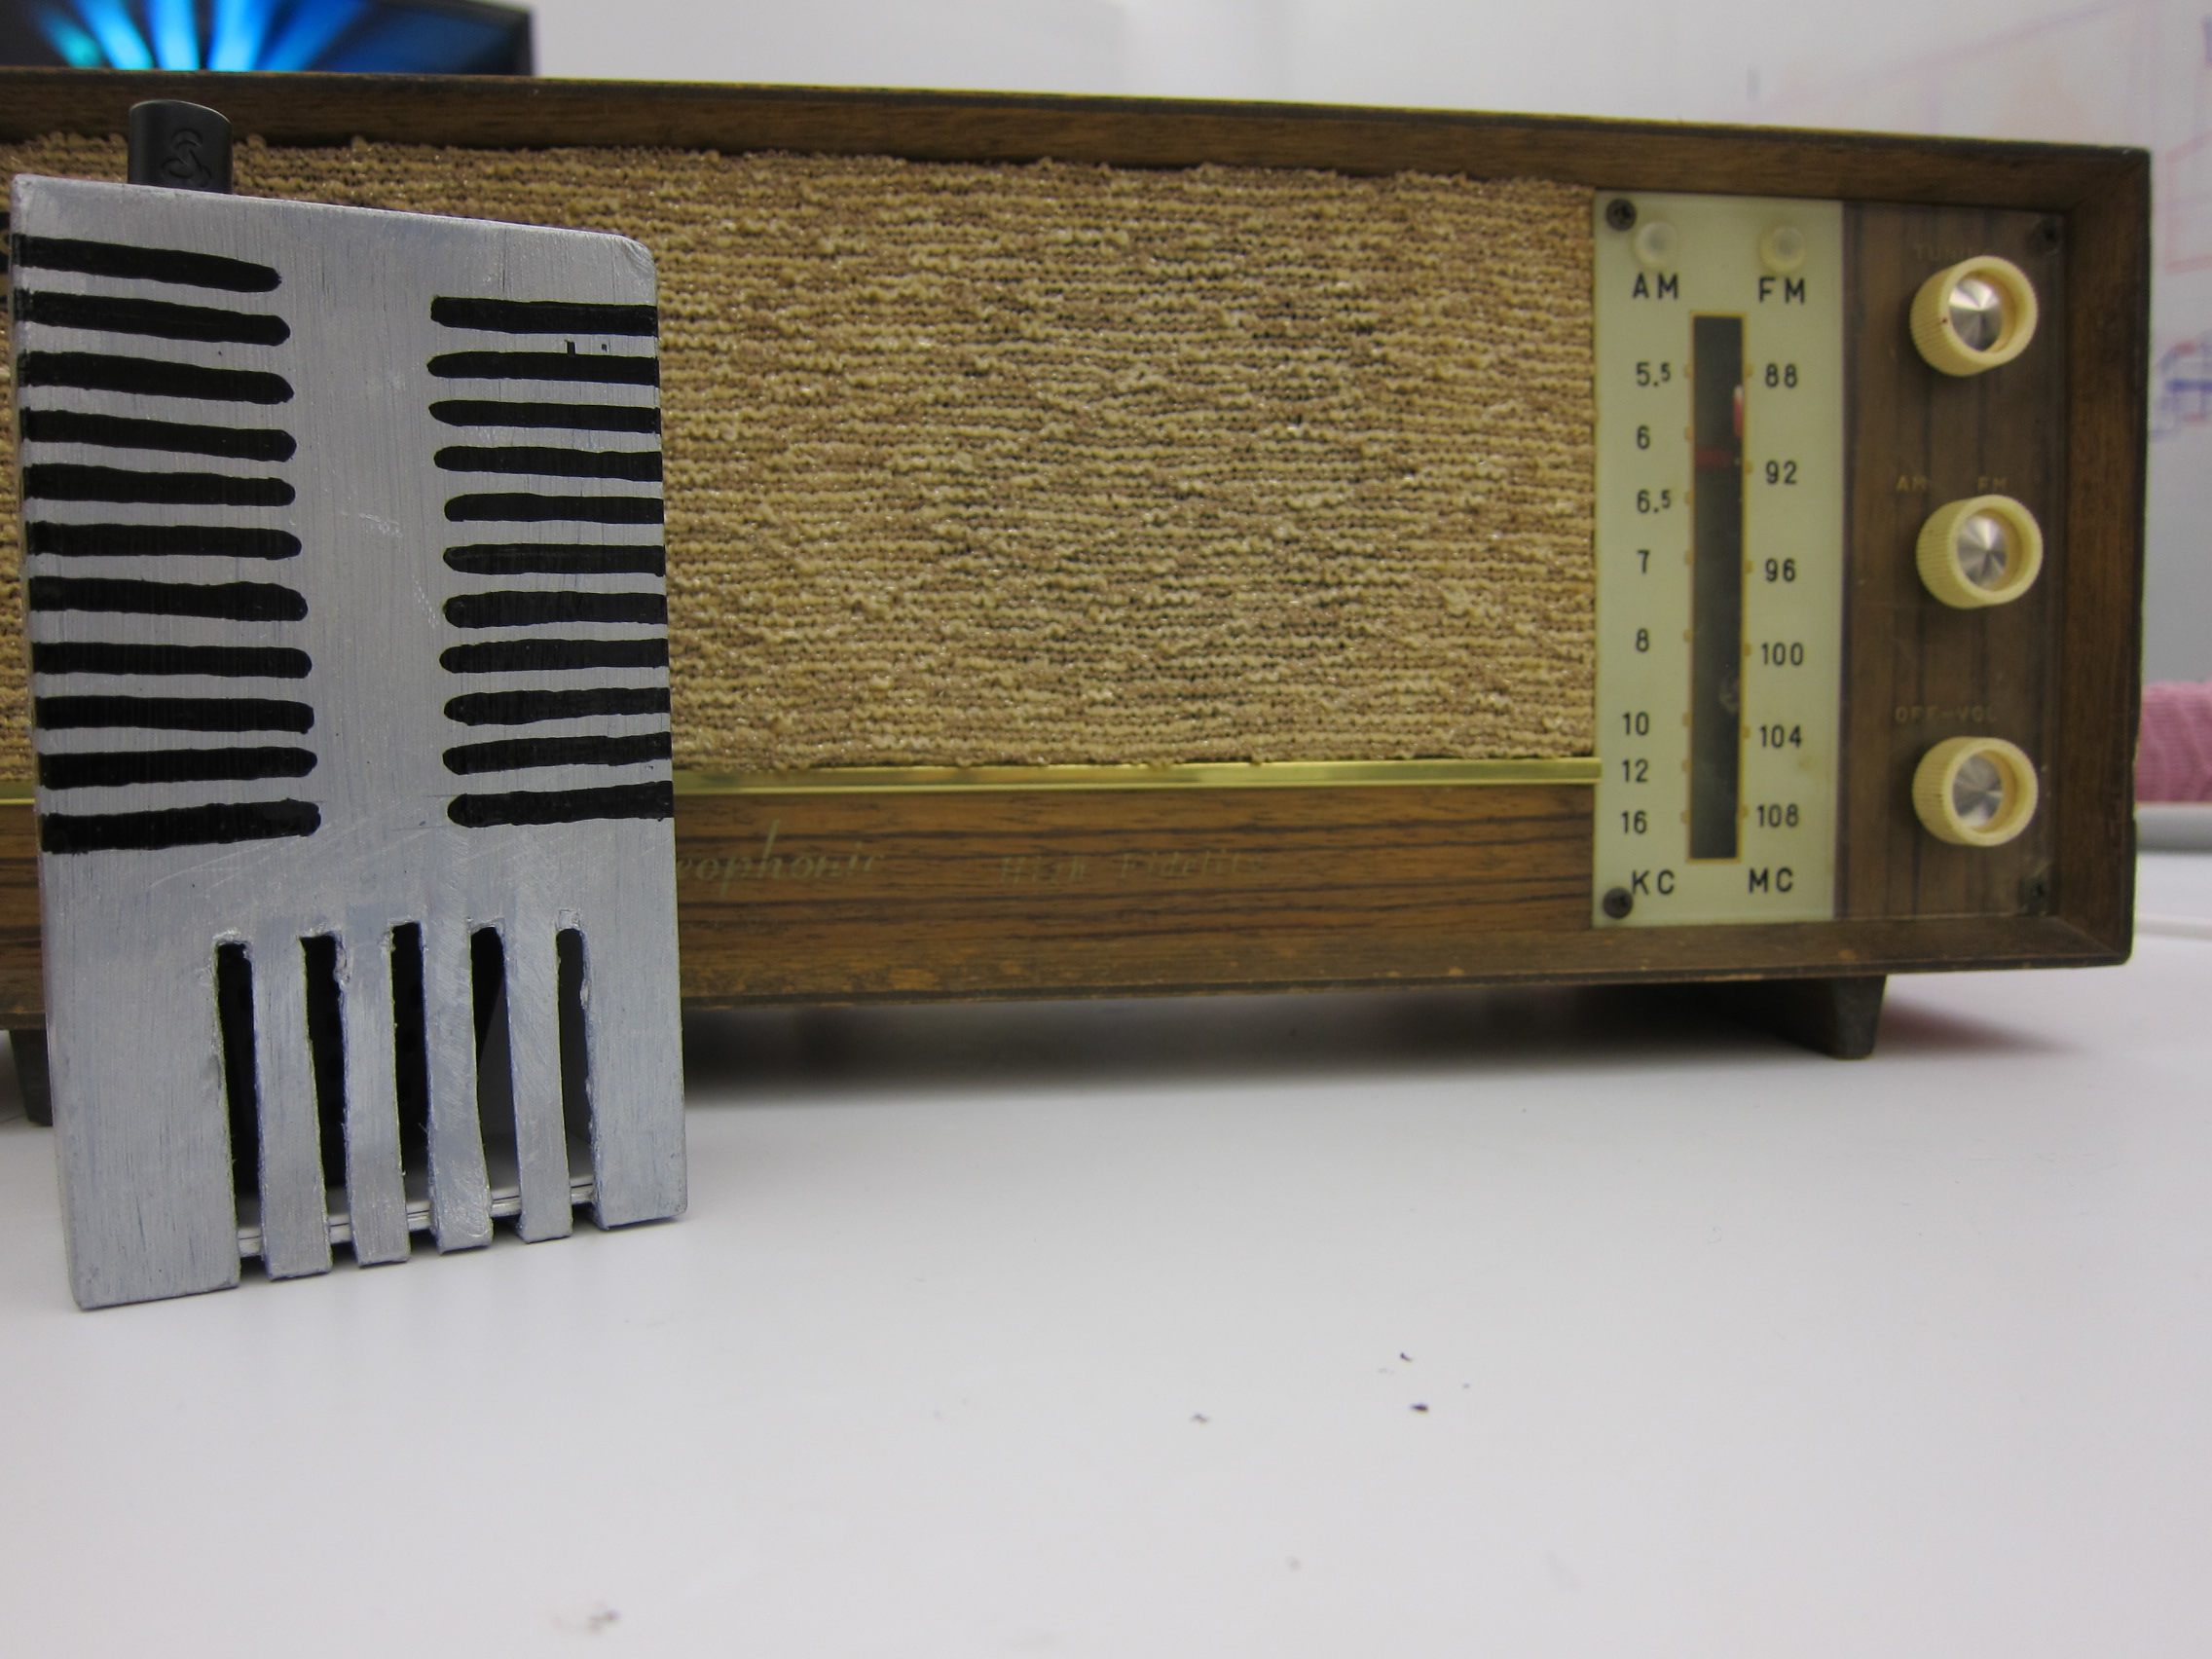
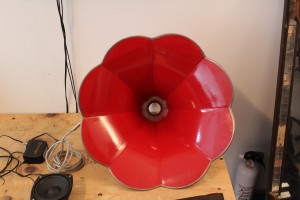
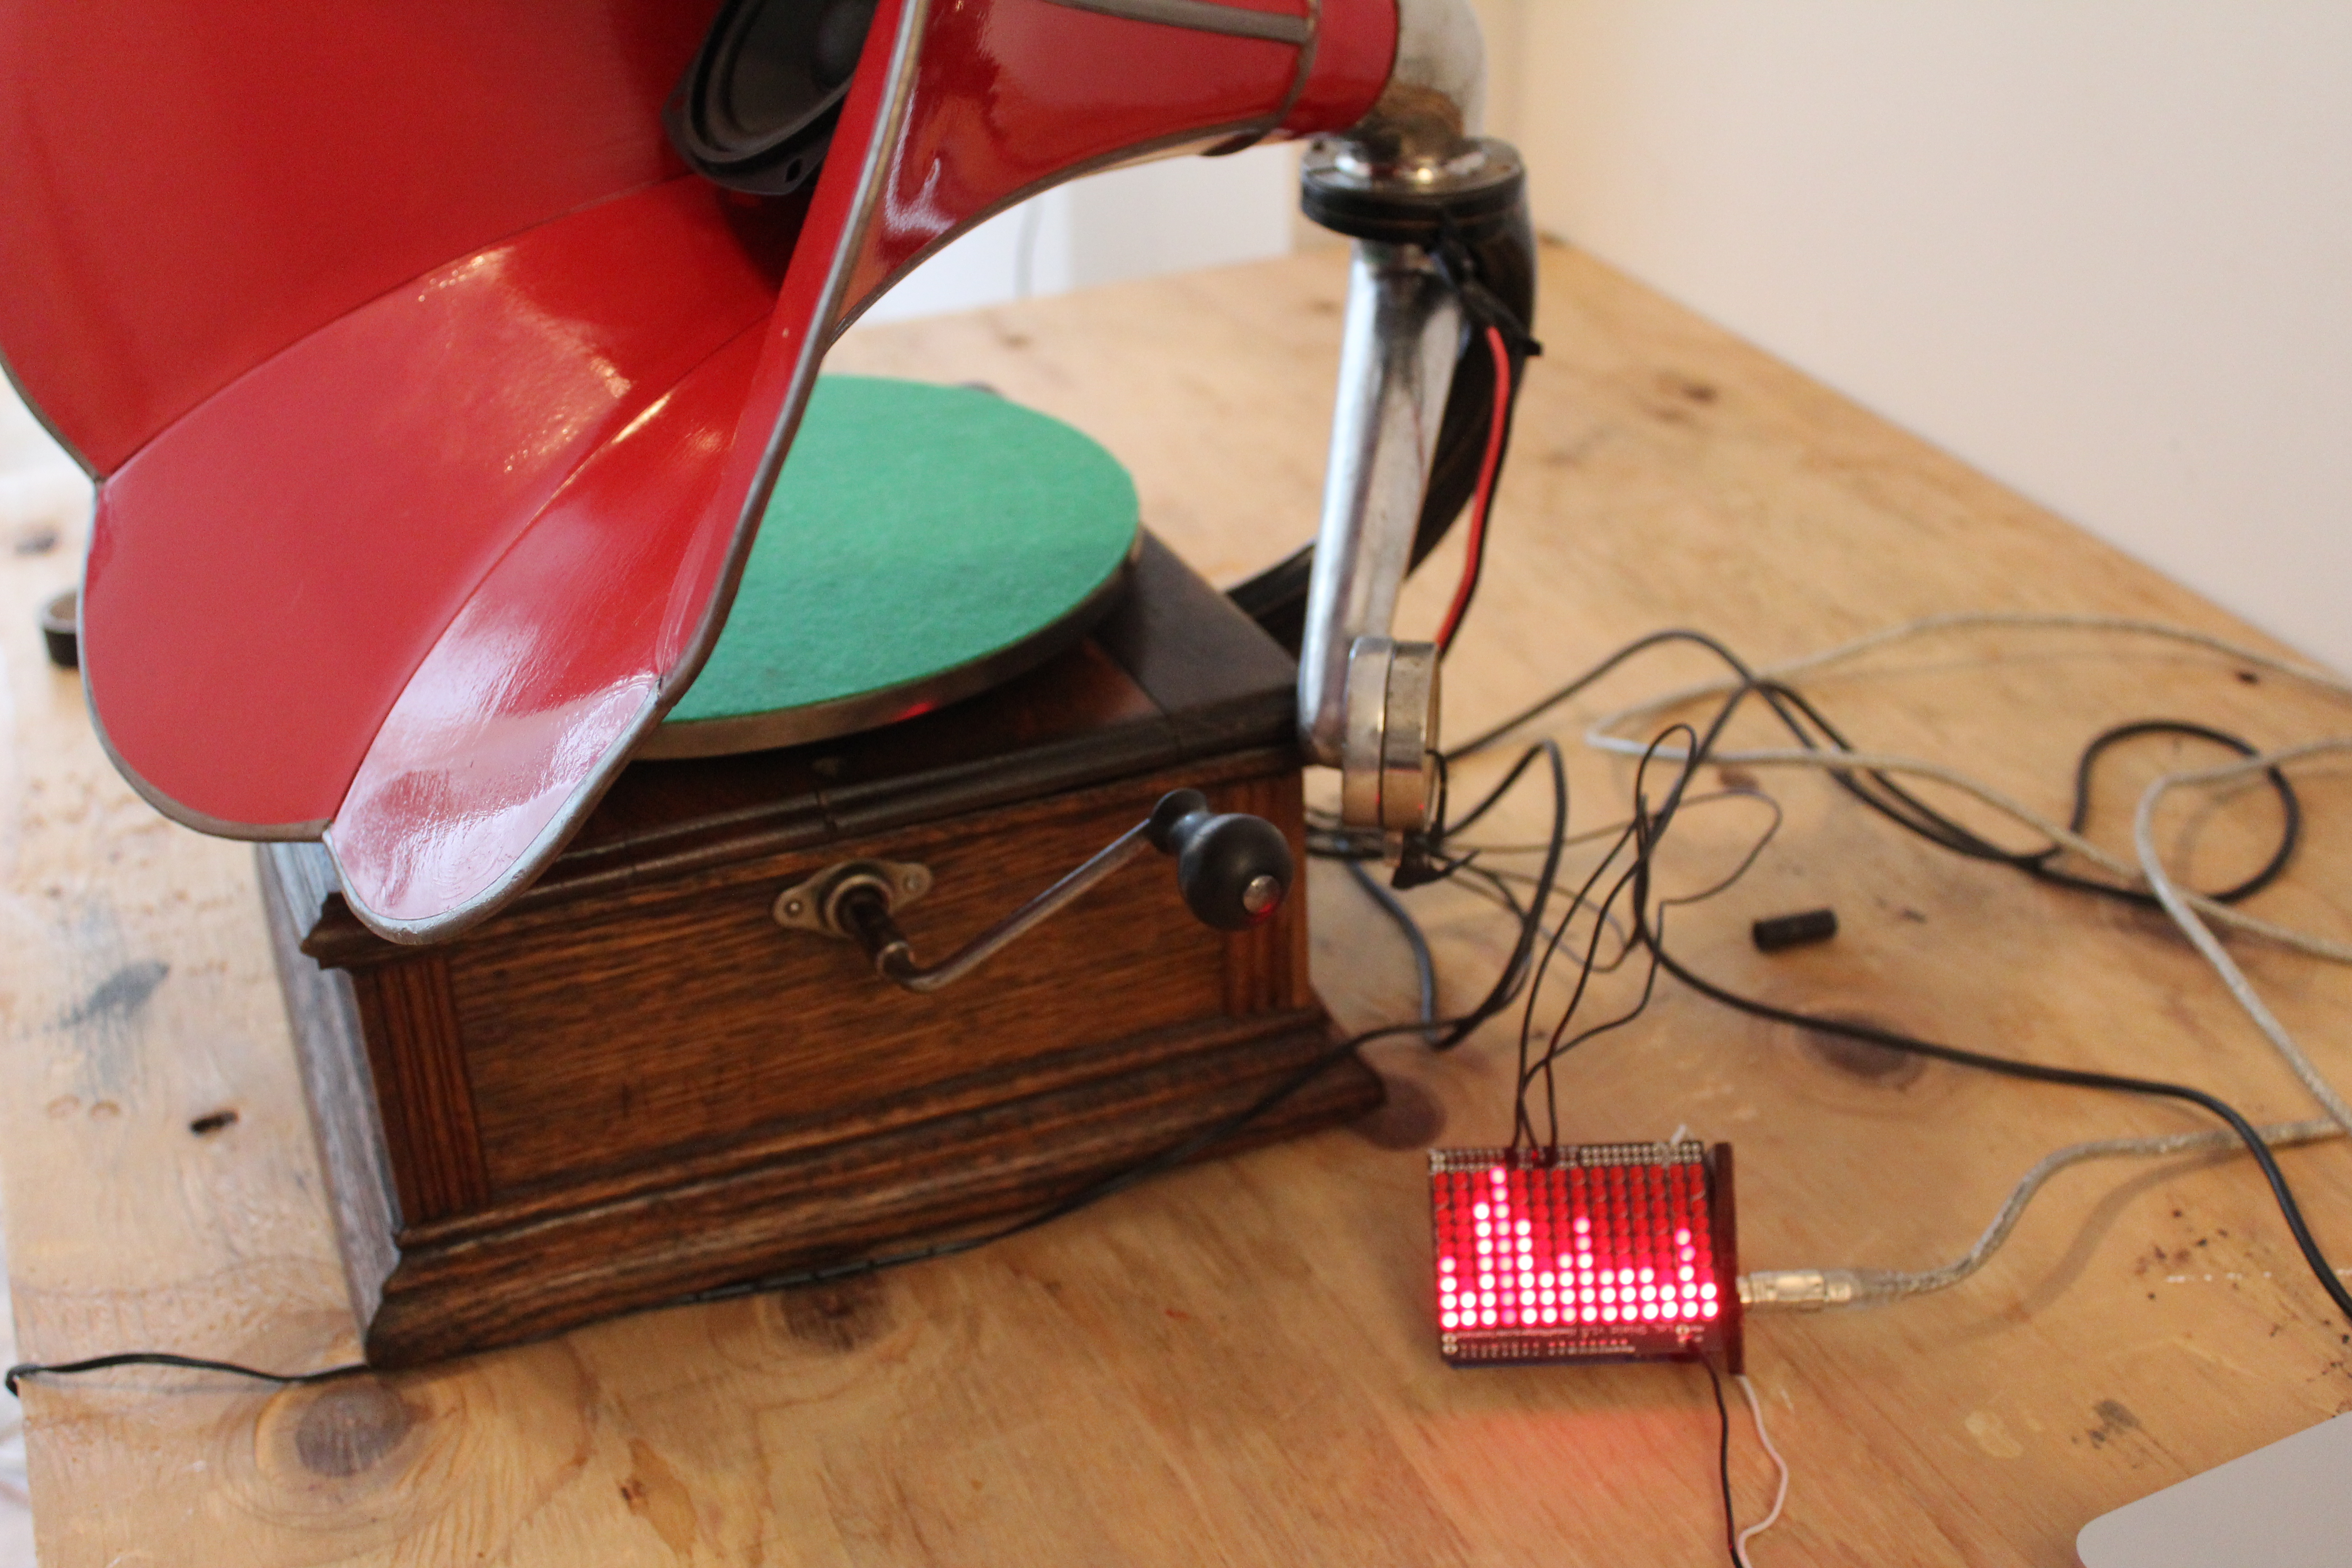
I was lucky enough to win a bet with a friend (something about the melting temperature of a plastic..) and got his superb grammaphone. Here’s what i wanted to do : i will place a woofer inside of the grammaphone’s horn, and connect it to an amplifier, an arduino and a computer. It will basically be a “remake” of the grammaphone or “a new version” of it. The role of the arduino is to be connected to the LoL Shield, which will be reacting to the sound waves, it will displayed an audio spectrum. That will not be the only option, i also want to use the “crank”, basically triggering an energy or something when the platform is moving.

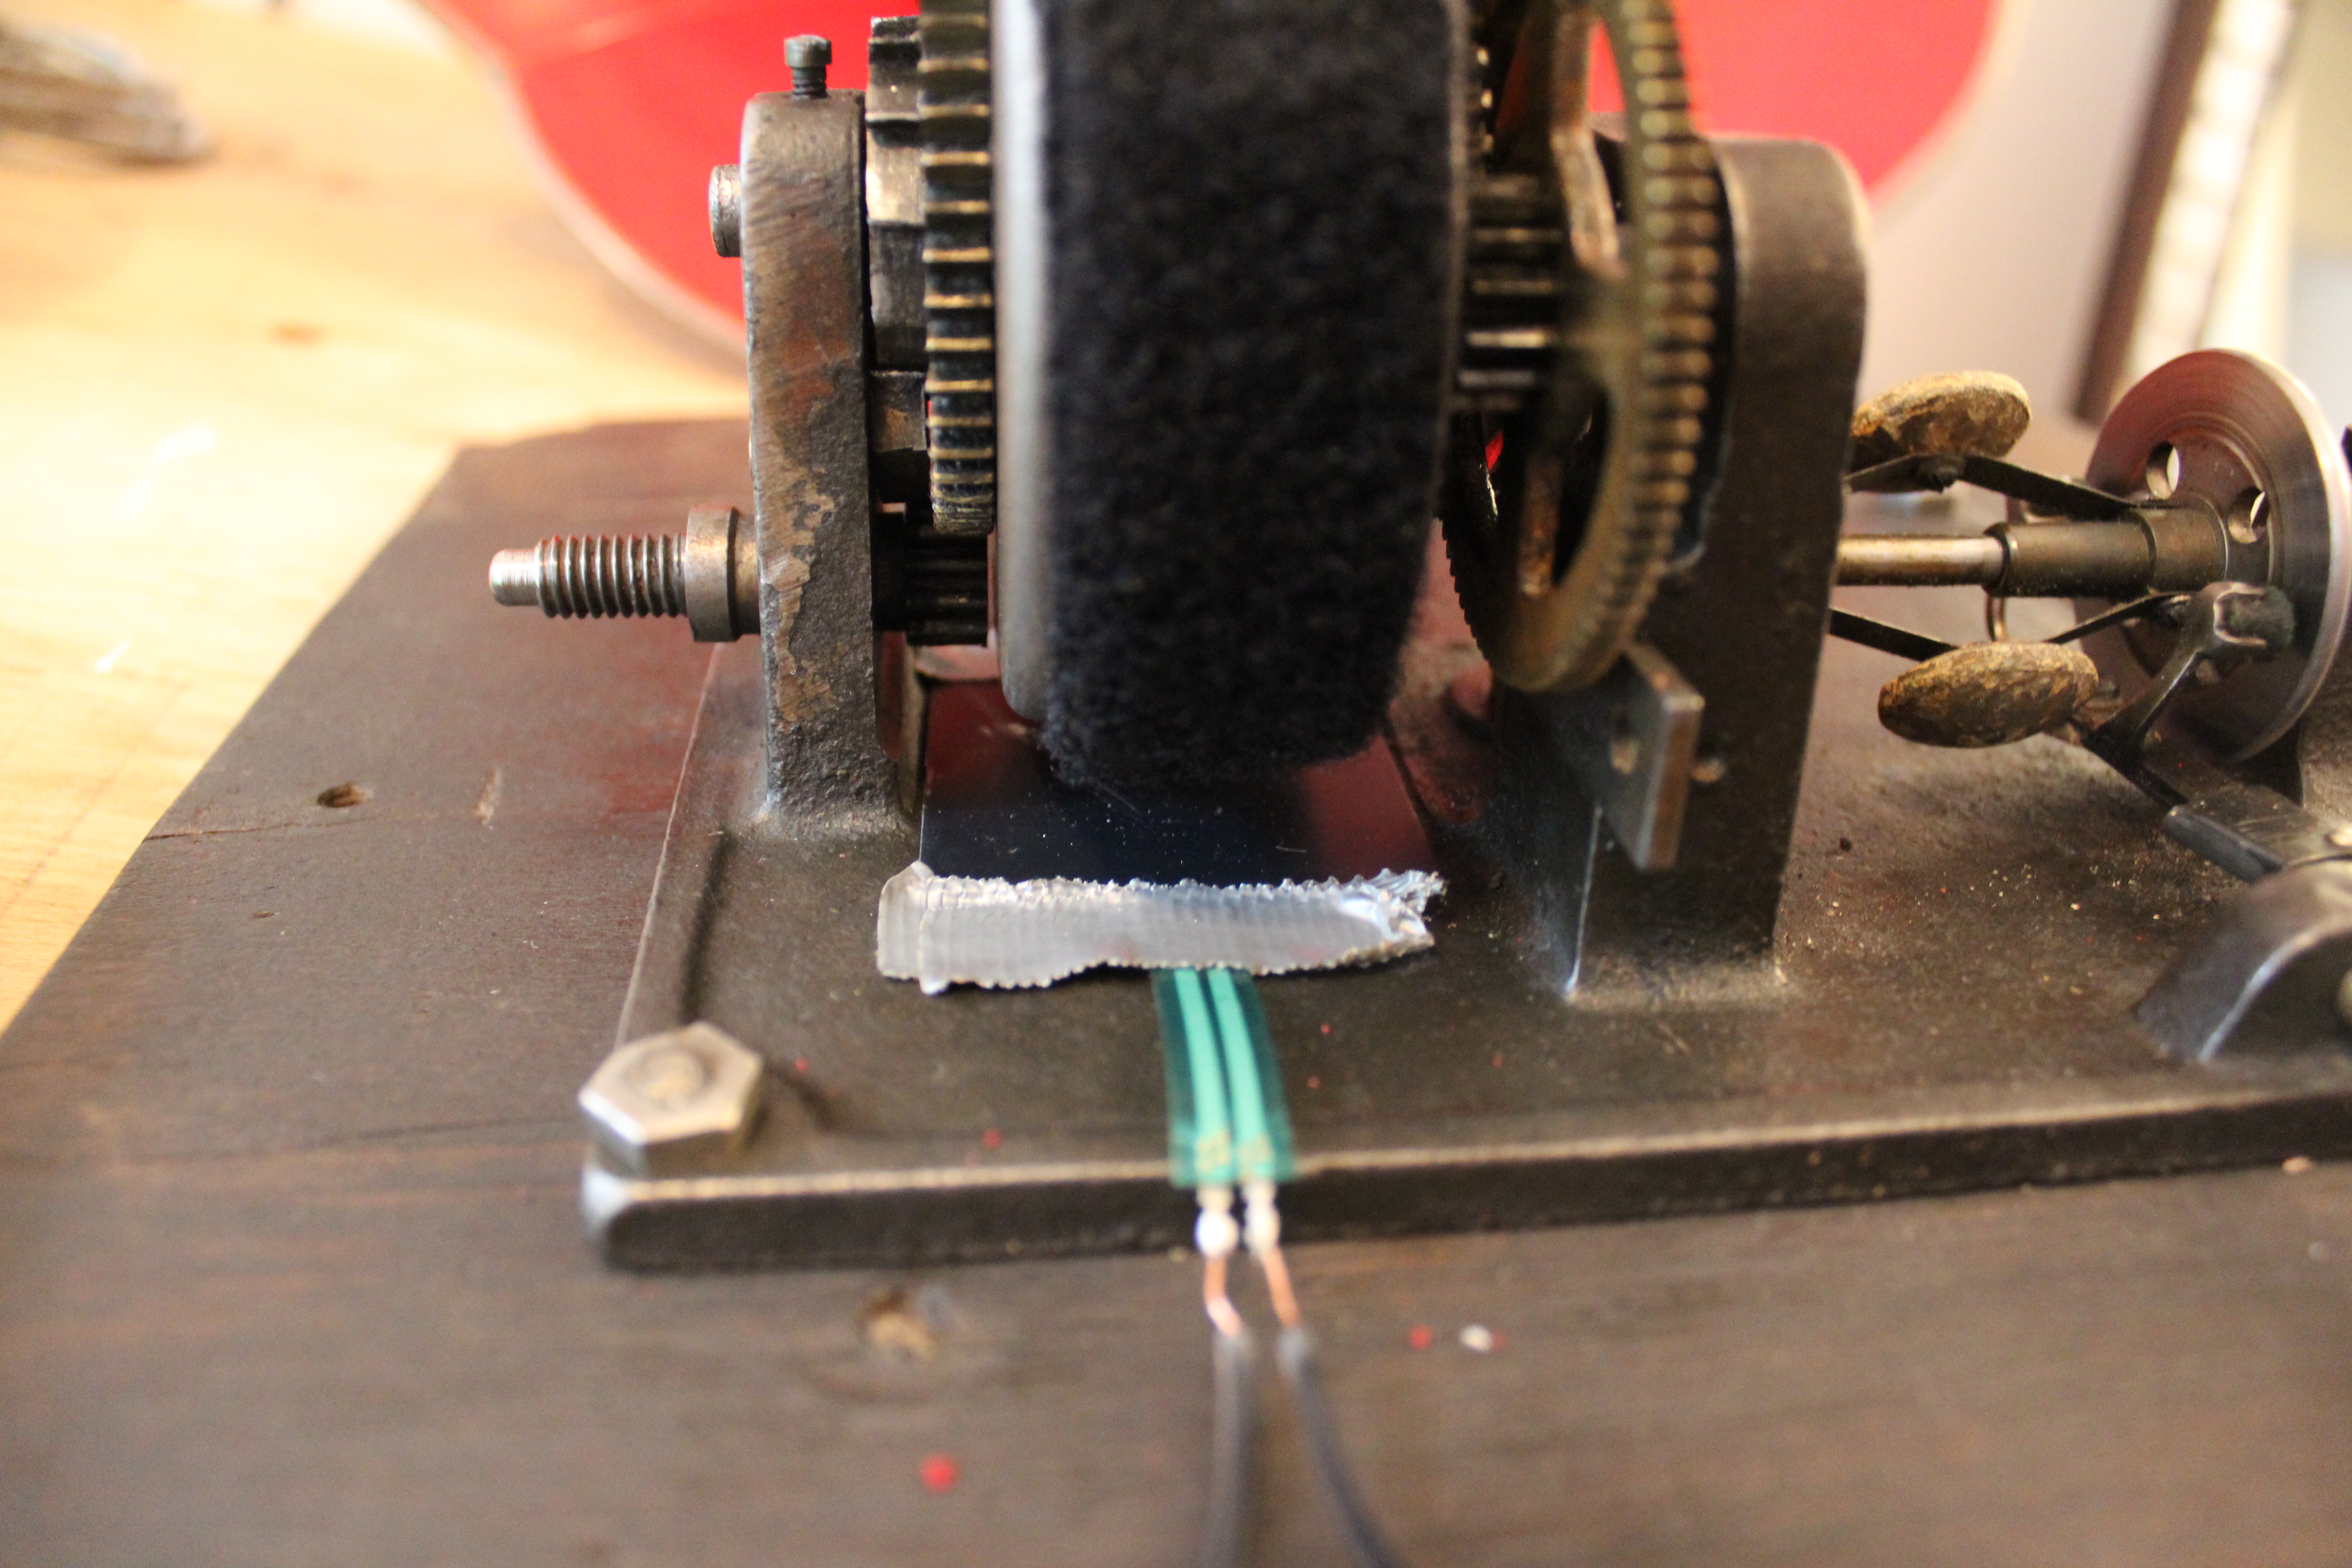
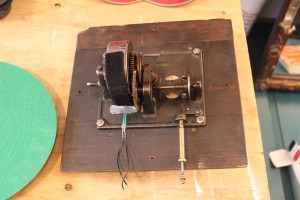
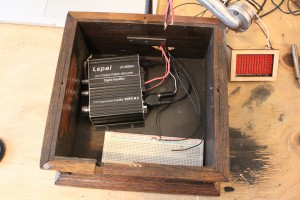
This is what i ended up doing : on the mechanical wheels of the gramophone, i saw there was a little space between the biggest wheel and the wood. I thought this would be a good place to install a pressure sensor which would trigger something. Therefore i decided to install the pressure sensor under that wheel and stick some velcro on the wheel itself so that a pressure is applied on the sensor every half lap. The reason for the pressure sensor location is that it can be triggered by cranking the handle. Therefore all the user needs to do is cranking the handle, as on any gramophones, and the mechanism (from analog to digital) will run by itself.

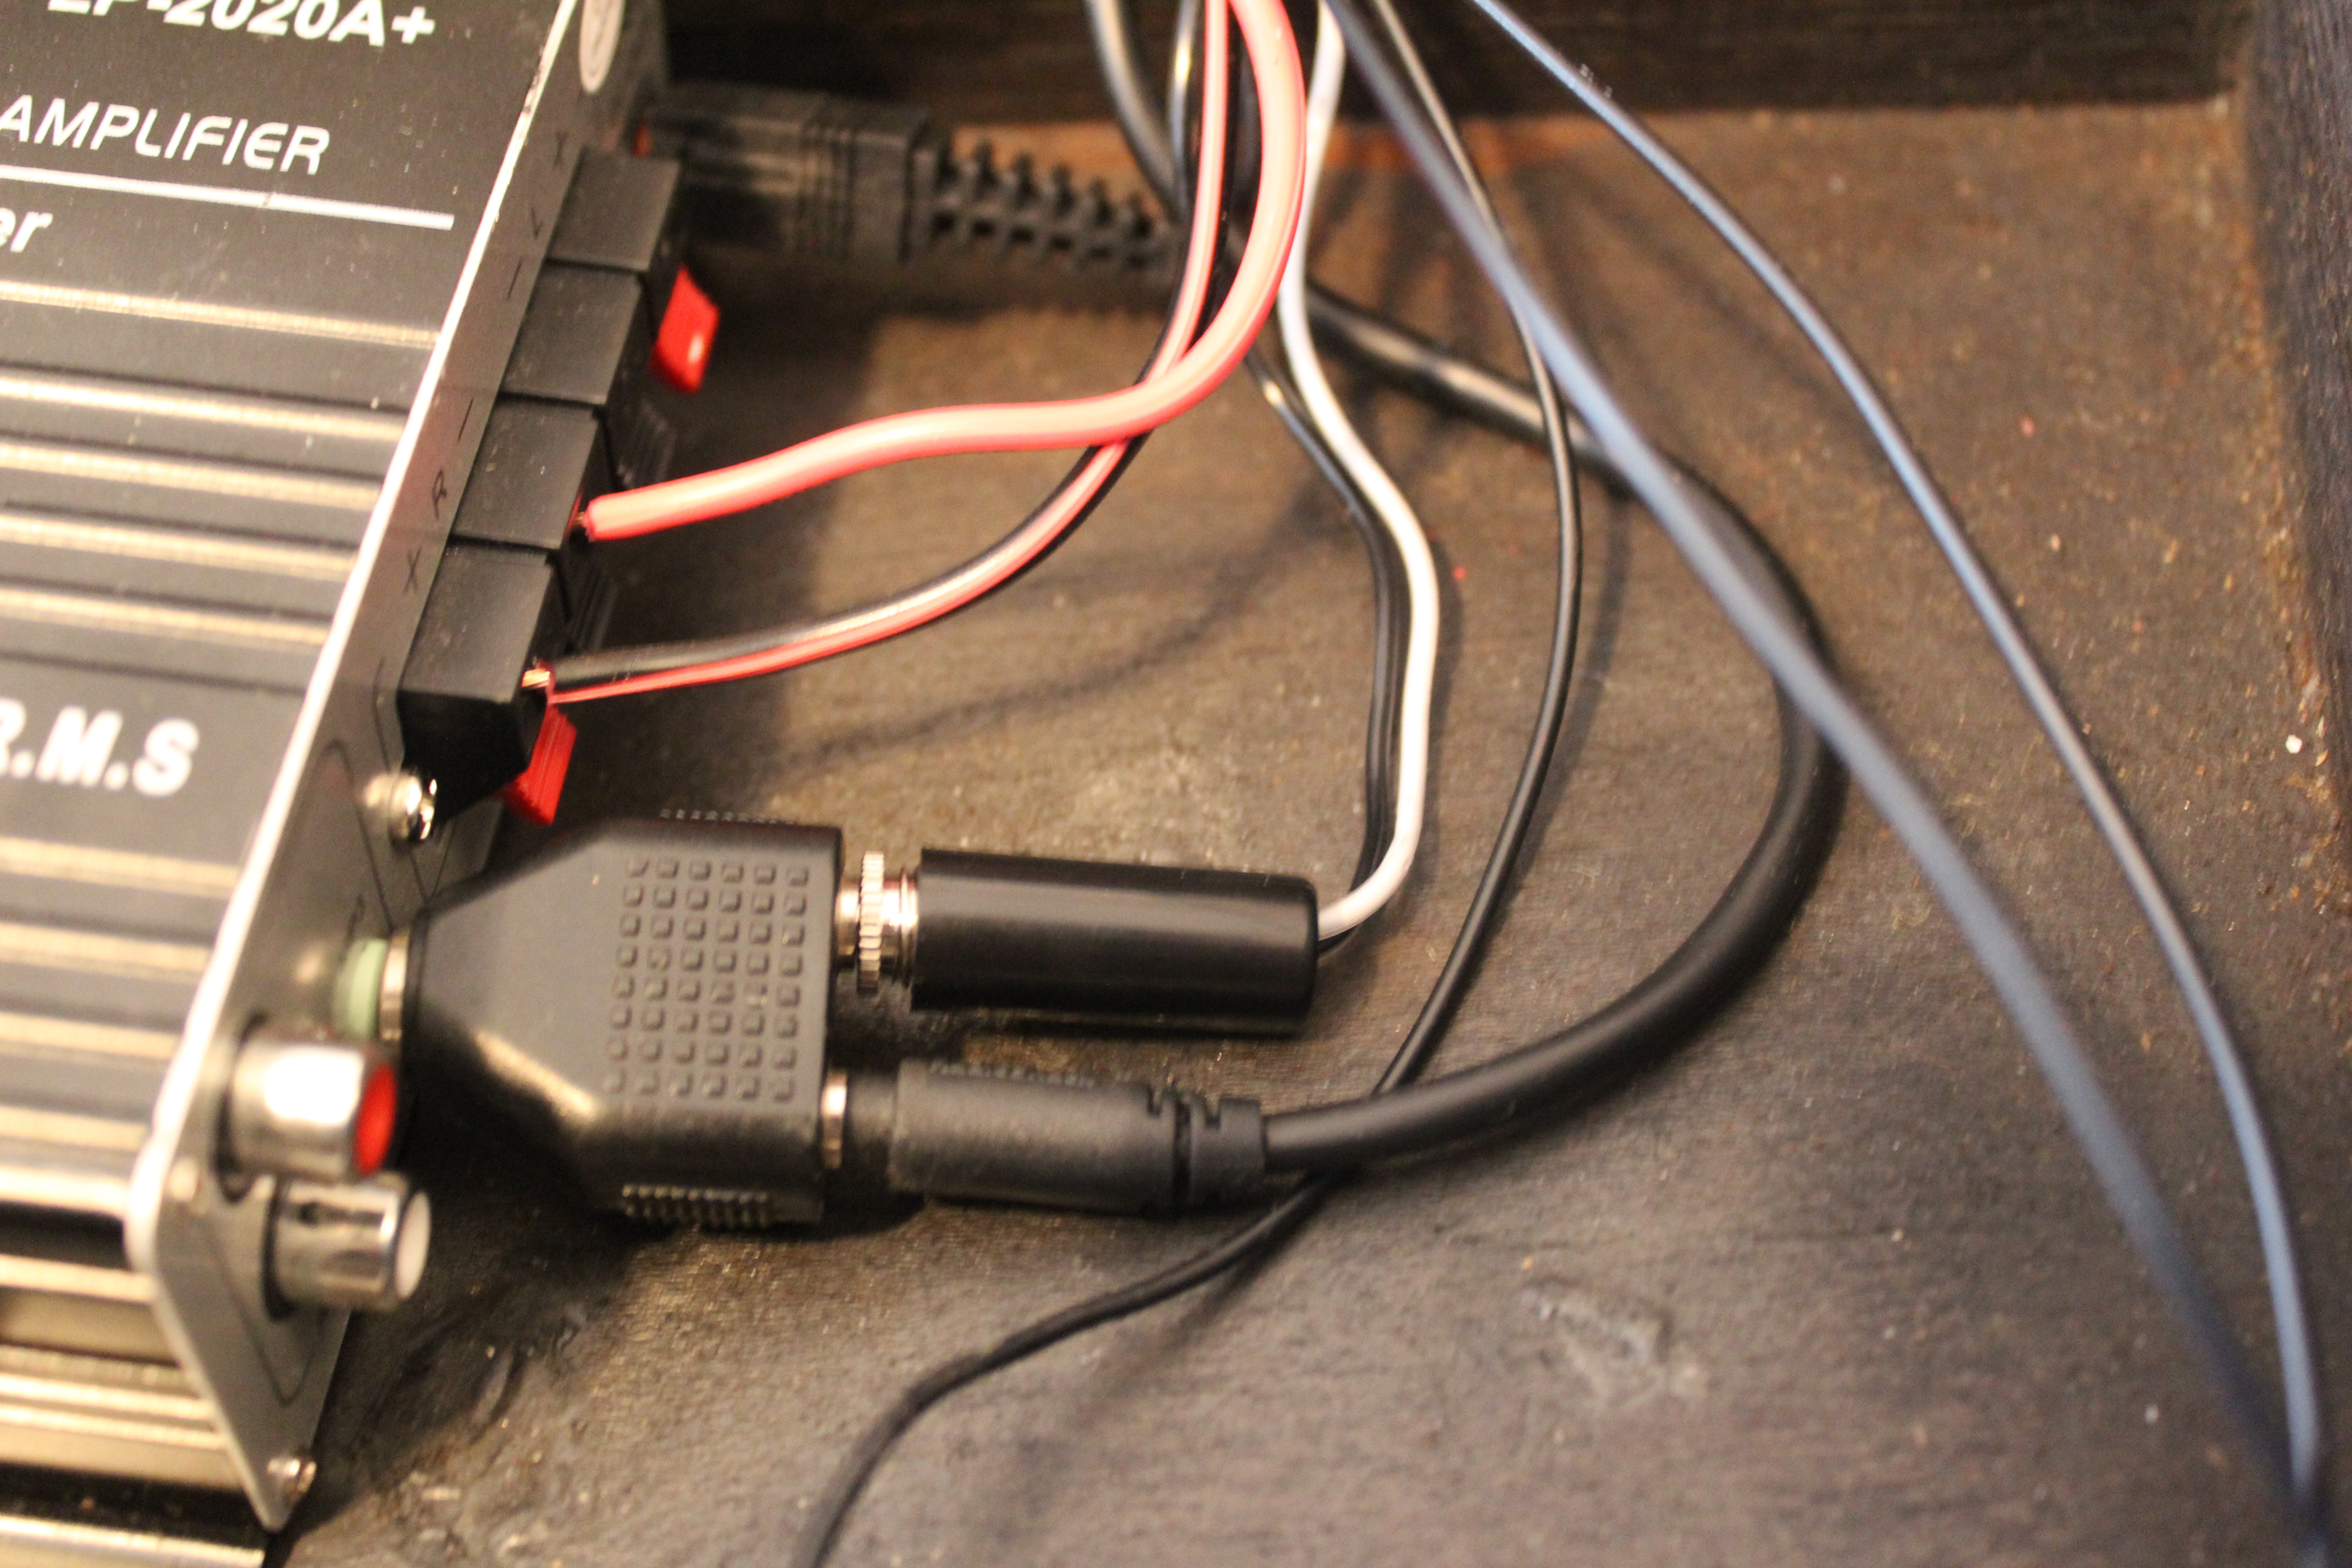
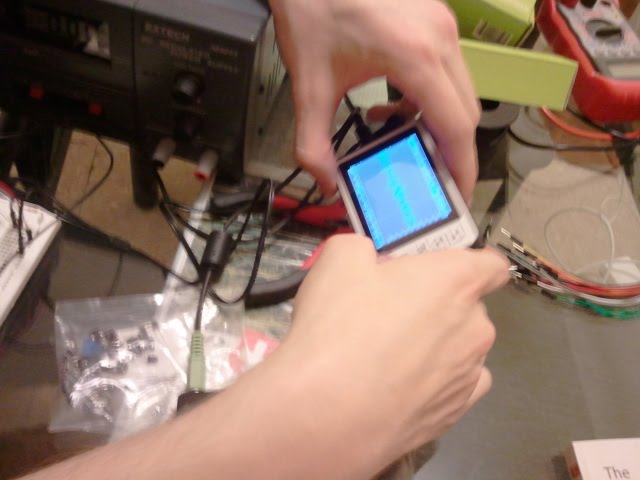
When pressure is applied onto the pressure sensor (which is connected to the breadboard inside the gramophone box), it is detected on processing as values. I used a code that sends bytes from arduino to processing (serial event) so that i could use a sound library on processing : MINIM. What i asked arduino is to detect values when pressure is applied. What i asked processing is to detect that arduino detected values. When it detects that, those bytes are sent to processing and when the value is superior to 1, play a music (player.play) otherwise, pause it (player.pause). At the same time, i have a LOL (Lots of Leds) shield acting as an audio spectrum and reacting as sound waves to the beats and frequencies of the sound. So every time sound is detected, the LoL shield reacts as an audio spectrum, otherwise, it stops. To have the music played from the computer to the amplifier to the woofer, i obvisouly needed an audio jack. If i wanted the LoL Shield to work at the same time, i’d need another one. So what i did is that i installed a double audio jacks receiver on the amplifier so i can plug both the sound and the LoL shield. Only problem with this is that i’m loosing a bit of the quality of the sound; but the horn of the gramophone amplifies the sound by itself.

HERE IS THE VIDEO : http://vimeo.com/33864489


Here is the code for arduino :

#include <Charliplexing.h>
#include <fix_fft.h>

#define AUDIOPIN 5

int press1 = 0;
int val1 = 0;

char im[128], data[128];

char data_avgs[14];

int i=0,val;

void setup() {
LedSign::Init(); //Initilizes the LoL Shield
Serial.begin(9600);
}

void loop() {

for (i=0; i < 128; i++){
val = analogRead(AUDIOPIN);
data[i] = val;
im[i] = 0;
};

fix_fft(data, im, 7, 0);

for (i=0; i< 64; i++){
data[i] = sqrt(data[i] * data[i] + im[i] * im[i]); // this gets the absolute value of the values in the array, so we’re only dealing with positive numbers
};

// average bars together
for (i=0; i< 14; i++) {
data_avgs[i] = data[i*4] + data[i*4 + 1] + data[i*4 + 2] + data[i*4 + 3]; // average together
data_avgs[i] = map(data_avgs[i], 0, 30, 0, 9); // remap values for LoL
}
// set LoLShield

for (int x=0; x < 14; x++) {
for (int y=0; y < 9; y++) {
if (y < data_avgs[13-x]) { // 13-x reverses the bars so low to high frequences are represented from left to right.
LedSign::Set(x,y,1); // set the LED on
}
else {
LedSign::Set(x,y,0); // set the LED off
}
}
}

val1=analogRead(press1);
//Serial.println(val1);

//Serial.println(val1);
Serial.write(val1);

}

Here is the code for processing :

//—————— Serial Variables ——————–
//this is a library we are importing into this sketch
import processing.serial.*;
Serial myPort;                       // The serial port
int[] serialInArray = new int[1];    // Where we’ll put what we receive
int serialCount = 0;                 // A count of how many bytes we receive
boolean firstContact = false;        // Whether we’ve heard from the microcontroller
int sensor1;       // Our Incoming Sensor variables
int oldsensor1;  //Saved Sesnor vars
//——————————————————-

import ddf.minim.*;

AudioPlayer player;
Minim minim;
Timer timer;

int val1=0;

boolean checkForce = true;

void setup() {

String portName = Serial.list()[0];
myPort = new Serial(this, portName, 9600);

size(800, 800,P2D);
minim = new Minim(this);
player = minim.loadFile(“tasteyou.mp3”, 2048);

}

void draw () {
background(0);
stroke(255);

if (checkForce == true)
player.play();
else
player.pause();
// println(checkForce);
}

void serialEvent(Serial myPort) {

val1 = myPort.read();         // read it and store it in val
if (val1 > 0) checkForce = true;
else checkForce = false;

//println(val1);
}

Final Project : Taste of Email

Final project Lost Tech / Found Tech : Taste of Email 

As we are in the digital age when everything is transformed in the screen. Hence we miss some other senses we had with objects as we used to have before. When I think of something ordinary that I do everyday like email, I would want to revive the feeling of sending a letter, especially the moment of closing an envelope that one has to lick the cover to close an envelope.

To make this project, I created an email application, which connected with an interface device that user has to lick to send an email.

For this project, to code in processing was very hard for me, since I’m not really familiar neither with coding and physical computing. Luckily I got some library codes to adapt to make this project, yet it’s hard to understand those codes and combined them all. I used a code ‘Simple E-mail Checking’, by Daniel Shiffman, for the function that connected to email account in the Internet and I used ControlP5, by Andreas Schlegel, to make an interface and importantly a lot of help from friends too. For a licking interface, I used unconnected two wires as opened circuit and used water from tongue to connect the circuit. To connect Processing to Arduino, it’s harder because water is not really conductive enough for Arduino. Hence Leif helped me by using ‘StateChangeDetection’ code in Arduino example and invert some statements to make an input more sensitive. In the end, it worked, even though too many emails would be sent in one time.

Here I tested if the circuit would work


An interface device for a lick connected to Arduino.

Arduino code

interface coding in processing, this one couldn’t do word wrapping so I seperated to many lines as in the old typewriter.

Finally Ben helped me to make the word wrapping functional

with a lick, an email sent!


Library code :
ControlP5 by Andreas Schlegel
Simple E-mail Checking by Daniel Shiffman

Special thanks to :
Jonah Brucker-Cohen,
Katherine Moriwaki,
Isaac Malca,
Leif Percifield,
Benjamin Jens Norskov,
Ramiro Corbetta,
Lola Ye


Assignment 1: Low Tech / Rube Goldberg Machine

Assignment 1: Low Tech / Rube Goldberg Machine

Balls by Parinot and WenChing

Around two weeks before the presentation, we started a new project with a new group. I and WenChing started to pick up some trash from the 4th floor of 66 W building. We found an apple desktop and a power supply. We dismantled it and unfortunately, it didn’t work. What we could have done, since we had only a few fans and a power supply, was just to make it as simple as we could as the name of an assignment, ‘Low Tech’. We came up with an idea of using ping-pong balls and fans to make those balls to move and trigger a circuit. We made some ramps and tied two wires with a fan, connecting with a stepper motor, and wrapped all balls with foil. In the beginning of the movement balls would move down from a ramp by letting two wires, connecting with a stepper motor’ open. Then those balls would make the circuit close to trigger the last fan to blow a piece of paper with a word ‘BRAVO’.

Ramp test

     balls test

Balls VDO

 Balls VDO

Final Post, Project reviews

First Project:

I worked with Lain and the other Liz (as I endearingly call her) to create a part of the class Rube Goldberg Machine. We came together with lots of different types of junk including: a printer, a garage band drum set, blender, hotplate, lamp, and i think a keyboard. Non of us had any sense as to what we could work with or what parts we were looking for, so we took everything apart, and really only ended up using the printer. The loop that shifts the cartridge from left to right is what we used; when it was dropped that started the rubber belt on the printer, which when it reached the end, would pull into another machine. We had trouble getting it to drop, so we used an old orange juice bottle to prop up the cartridge container, and when someone punched it out of the way (or in the final sequence, when another machine’s force knocked it out of the way, the piece would drop on conductive aluminum foil and that would start the rubber loop

The Machine in totality was kind of a failure, but fun to attempt.


Dead Tech: Podcast Radio

For the second project Kate and I found an old radio that we wanted to get to play podcasts. We were using a potentiometer that would read every 100 intervals on the  channel knob. These would potentially trigger 10 different stations that would play from shoutcast stations in iTunes. Unfortunately the first radio broke, so here are pictures of the second. The potentiometer on the second radio never attached securely, so while out programming was good in arduino to max, we didn’t get the actual radio to work. In retrospect we should have left the potentiometer out of the radio, and manually turned it to trigger the radio.

Here are some pictures.

Lost Tech: Broadcasting system

For the third project Kate and I somehow wanted to reuse the radios that didn’t work in the last project. We decided to create a broadcasting system for two reasons: first, Radio like this historically were the main source of information and entertainment, and the people who’s voices were heard were limited…i.e. so were the stories and news shared. Nowadays there is a plethora of ways to share worldwide–through blogs, podcasts, youtube, vimeo, twitter, etc. We wanted to showcase the widening of opportunities for broadcasting and sharing information. Also, because the 12th floor has issues with sound–everyone can here everyone, we were attempting to create a platform for those who really had intentional messages for the entire 12th floor.  TO do this, we hacked into talkie talkies, one was attached to the speakers of the old radio, the other was cleverly hid within a “microphone”–an old iPhone box we painted and used old speaker material in order to create a vintage feel. This worked! although the radios also had the inclination to pick up taxicab signals. Though a little bit messier, and I think kate and I were happy that we got a project to work, rather than repeat our arduino and pomp failures of the past.

Here are some pictures:


Tea Cups

For my final project for scrapyard I wanted to explore not only into lost and found technology but how this idea would relate to feminist theories. “Nuclear Families” are no longer a normal set american ideal and that stay out home moms, “housewives”, are phasing out. Yet society places these gender onto young girls and women. In a way we are being forced to conform and are trapped by societies views.

At a thrift store I found a tea set and a rolling pin. I then knitted cosies for each of these objects to demonstrate the entrapment of these ideals placed around women. Tea sets are feminized objects associated with female gathers and manners. The rolling pin is an object that relates to cooking, baking, and motherhood. I also knitted hot pads. I then places speakers inside of the tea cups and made a switch using an arduino to talk to processing to say things like “mind your manners” when you lifted up the tea cup off of the saucer. The hot pads are made so if you set someone down on them it will activate a switch that makes them say such things as “know your place” and “you belong in the kitchen”. Sadly, I was not able to get this working before final critics, it is still a work in progress but I plan on continuing this project with a tiny children’s tea set. I would also like to create a video piece where I will be using these objects as props. Hopefully that will be up soon!


Pictures should be up soon!

mp3 player 8 track final

My project was focused on bringing back dead sounds or sounds that are no long in use, like the sound of a rotary phone. So I set out to create an mp3 player incased in an old 8 track housing. The mp3 player was to contain 8 tracks of music and the music would be sampled through an arduino board and each track would slowly degrade over time. Slowly as the user play the tracked each track would become more and more warped, simulating the degradation that occurs with real analog 8 track tapes.

Alas, my labors were a failure at this time. Due to some voltage regulation errors while trying to get an Arduino uno to sample at a higher frequency, I burned it and it ceased to work. I then borrowed another board known as a Maple from a friend, and again I accidentally applied to much voltage during the project and ruined another board. But aside from these mistakes, I’m confident that the sampling effect can be achieved and I learned much from this project. I learned the inner workings of analog to digital conversions and about the coding of maple and so much more about electronics.


I also used an oscilloscope for the first time.

And here is the 8 track cassette I purchased from Meeker flea market.